![Grip-Vertical-Logo-Purple-1.png]](https://support.grip.events/hs-fs/hubfs/Grip-Vertical-Logo-Purple-1.png?width=23&height=34&name=Grip-Vertical-Logo-Purple-1.png)
In this article, we will cover the following:
- What does Grip Manage Registration look like and how does it work
- How to start configuring your event
What does Grip Manage Registration look like and how does it work?
Overall Branding & Configuration
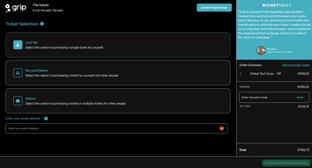
The full look of the registration app can be edited, including background colours for light/dark theme, buttons, tickets, and so much more.
There are two main assets that are used during registration, the event logo in the top left, and the 'registration banner image' on the right-hand side as shown in the mockup.
Ticket Selection
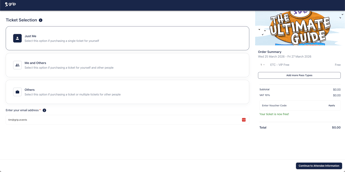
The first step that is unique on registration is the fact that people select whether they are paying a ticket for themselves, others, or themselves & others.
Just Me - If you're buying 1 ticket for yourself.
Me & Others - If you're buying multiple tickets for yourself and others.
Others - If you're only buying a ticket for others
This information is used on the next page to determine who tickets are assigned to and the credentials you're having to enter. It also determines whether your email is used as the email associated with a ticket or instead as an 'admin email'
Unique Email Addresses It's worth noting that registrants are required to enter a unique email address on the ticket selection page. This helps makes sure that all signups have a unique email associated with them.
With 'Add more pass types' feature, attendee's are able to purchase different pass types in a single purchase. This increases versatility and makes our registration more like an e-commerce experience.
Organizers can now disable multiple ticket purchases for a specific ticket type.
Attendee Information
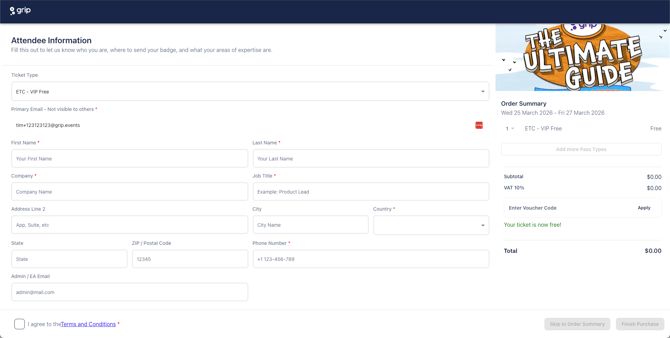
On the attendee information page, you've got full control as an organiser which fields are shown and you can determine for all fields whether it should be shown and/or required. Attendee's will be able to feed important information into the system, later used to fill out their profile details (profile image, their interests, etc. - it depends on what you configure it to be). Read about how to set up these fields here.
The email that has been entered on the previous page cannot be adjusted on this page to minimise confusion.
Beyond that, you can control your own conditional questions as checkbox, multiple choice, single choice, or free-form questions that can be assigned on a ticket-type level.
Order Summary
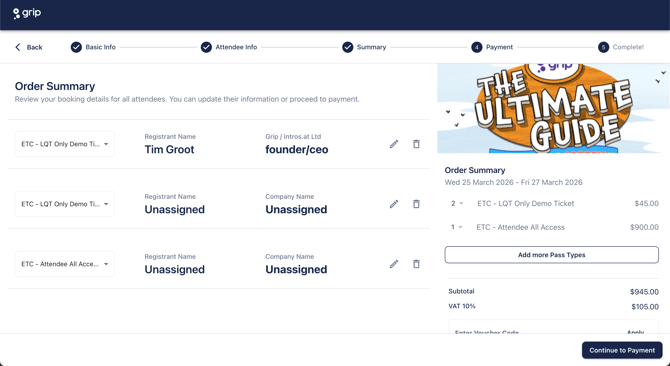
On the Order Summary, you can see the tickets you've assigned and in the case of multiple tickets, you can assign the ticket type to individual registrants.
One of the unique features of Grip Manage is the possibility to purchase "unassigned" tickets and different ticket types in a single purchase. Both are significant benefits compared to other registration platforms.
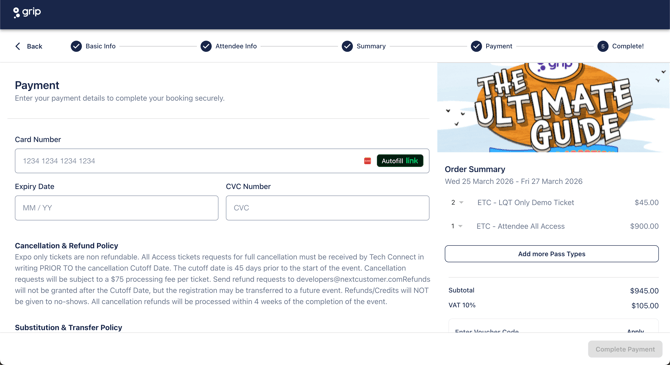
Payment
Grip Manage is tightly integrated with Stripe for payments, this includes being able to send custom metadata and a wide range of other useful features.
Grip also supports all major currencies and 3DS secure payments — including improved reliability for 3DS payment fulfilment — which are especially common in Europe.
Note: Organisers can now see visibility into pending / "awaiting payment" Stripe transactions directly in Grip Manage, along with clearer Stripe metadata mapping to make reconciliation easier.
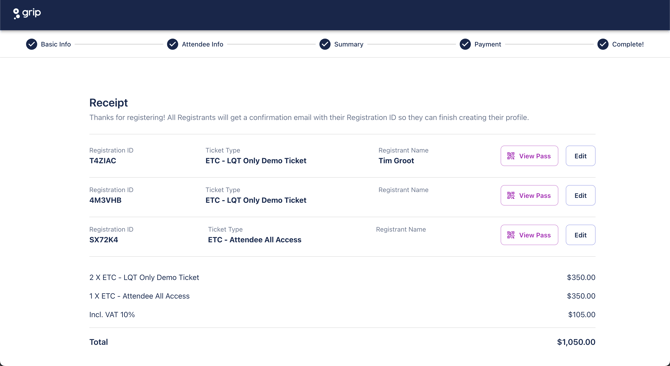
Order Completion
Once the order is completed the order receipt page is shown. This page can immediately be printed and be used as a receipt (not a legal invoice).
How to start configuring your Event in Grip Manage?
Use this guide once Grip has created your event and given you access to Grip Manage. It covers your event details, branding and team, so you're ready to set up tickets and registration.
Before you start
The Grip team creates your event for you. Once it's ready, you'll get access to Grip Manage.
Have these details to hand:
- Event name, dates and timezone
- Venue name and address
- Support email addresses for attendees and sponsors
- Your event logo and registration banner image
- Names and email addresses of colleagues who need access
You can change any of these settings at any time, including after registration opens.
Step 1: Add your event details
- In Grip Manage, go to Event Settings > Settings.
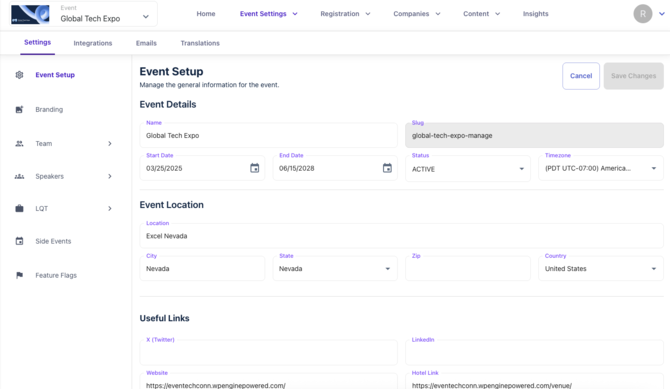
- Complete or check these fields:
| Field | What it's for |
|---|---|
| Event details | Your event's name, dates and timezone. Attendees see these during registration. |
| Status | Leave as Draft while you're setting up. Switch to Active when you're ready to launch. |
| Location | Your venue name and address. |
| Support email addresses | Where attendees and sponsors can contact you with questions. There's a separate address for each. |
Tip: Set your timezone early, so the dates you add later (for example ticket pricing windows) line up correctly.
Step 2: Add your branding
You add branding in two places:
- Event Settings > Branding: your event logo.
- Event Registration > Branding: how your registration pages look to attendees, including the banner image, colours, buttons and fonts.
- Go to Event Settings > Branding and upload your event logo.
- Click Save.
- Go to Event Registration > Branding and set up how your registration pages look.
- Click Save.
Step 3: Set up domains and other integrations
- Go to Event Settings > Integrations.
- Click "Manage".
- Select which integrations you want to use.
- Configure the integrations following the guides here.
Make sure to configure Email identities in order to be able to send email notifications from Grip Manage.
What's next
Your event is set up. Next steps:
When everything is ready, go back to Event Settings > Settings and change the status to Active.