Sales: Can I use the idloom QR code and print at home badge for networking with Grip’s QR scanner?
Yes this is supported ! You can use the QR code on the confirmation email and badge to scan to connect with Grip app. To enable this you must set “QR code for external check-in system (using attendee UID)” in Content → Automatic Emails.
Sales: If I configure individual sessions in idloom as “Options” will they automatically appear in Grip’s schedule?
Yes options are currently linked 1-1 to sessions. If an attendee selects an options this will be added to the user’s “My schedule” in Grip. This can also be now used for the scan-in per session in idloom.
Sales: If I enable Scan-In per session using the idloom webapp will this work offline?
No the idloom webapp requires internet connectivity - so if this feature is to be used we would recommend a dedicated scan-in/out wifi network that’s hidden / locked for public.
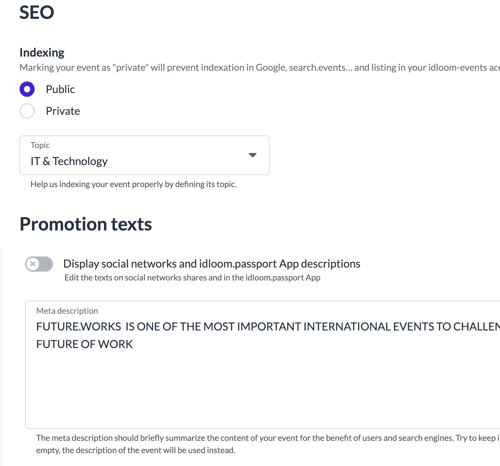
Sales: Can a Grip Registration website or landing page (ID loom) be SEO optimized?
The IDloom system allows for two types of SEO optimisation:
- Metadata Description for SEO
- Topic based metadata for SEO
- Website copy and images including “alt” tags etc. in WYSIWYG editor
Sales: Can a Grip Registration use UTM codes to track campaigns?
Yes! The IDloom system allows for to append UTM parameters to the registration url e.g. https://registration.grip.events/grip-registration-sales-demo-richard/register?utm_source=facebook&utm_medium=social&utm_campaign=bcfc and allows for GA / GTM tracking code to be added to the page this then allows the organiser to analyse campaign efficiency and attribution via GA.
Sales: Is it possible to have mandatory and optional fields that are custom / bespoke per event?
Yes - this can all be configured in the form builder. There are checkbox / choice list / country list / date / email/ file upload / and free text available as input options in the form builder. Any custom field can be set to be single /multi choice or optional / mandatory:
.png?width=500&height=637&name=Untitled%20(1).png)
Sales: Can I have conditional “smart” logic on fields - (e.g., if country = USA, then “state” field appears, but if country = UK then state doesn’t appear)?
Yes - this can all be configured in the conditional form builder. You can specify under which conditions to show a separate form field / drop down etc. Here’s an example:
.gif?width=500&height=434&name=2022-07-18_17-10-18%20(1).gif)
Sales: How can create a large number of discount codes (e.g. for individual speakers / exhibitors etc)?
The best way to do this is via an upload sheet which is sent to idloom to populate the discount codes in their system. Please speak to your Grip support team for help on this matter.
Design: Can I have multiple branding types / designs per client?
Not currently branding is defined on the Profile level, this means that a customised font / colour scheme etc applies to all events in this profile.
.png?width=500&height=420&name=Untitled%20(3).png)
General: Where can I change the logo for the event?
It is at the profile level: Go to the “Profile” sidebar menu, then to “Essentials”
General: Does Grip Registration integrate with CRM systems like Hubspot / Salesforce etc.?
there’s a lot of pre-coded integrations which are available via idloom ↔ zapier ↔ CRM flow. This can be done very quickly (2 min is what they claim) and there’s a list of Zapier integrations available here (including Salesforce / Google Sheets / Mailchimp / Slack etc.): https://zapier.com/apps/idloom-events/integrations#page=1 Also here’s the one for hubspot.
General: How do I preview an event that I’ve setup in idloom?
You need to first publish (not technically 100% necessary) and then preview using the arrow button
General: Where can I edit the footer for the website?
This is also done at the profile level. Go to the “Profile” sidebar menu, then to “Account information”
.png?width=666&height=219&name=Untitled%20(5).png)
General: Is there an easy option to create buttons in the content area (other than HTML coding it)?
In the content editors, hyperlink a text, and then select the style function. You will then be able to make that hyperlink into a button:
.png?width=671&height=169&name=Untitled%20(6).png)
General: Is there a media library where we can upload images or documents in order to show them as part of the texts or do they need to be hosted externally?
You can add any files to the event. Go to the “Content” sidebar menu, then to “Files”. There you can add as many files as you would like. You will be able to attach them to confirmation emails and/or publish them to a “file” section on the website where guests can download them directly. These files will also be available in all the text editors (see below).
.png?width=688&height=514&name=Untitled%20(7).png)
.png?width=688&height=214&name=Untitled%20(8).png)
Program: when using the schedule tool is it possible to adjust the row height or is this standard?
Yes the row are heights can be adjusted but not by you from the backend. Only via customisation by idloom frontend developers. Otherwise you can create your program table from scratch in the text editors, where you can customise your table fully.
Program: Why would I want to create a session in Grip Registration vs manage the entire schedule in the Grip Engage Platform?
Creating a session in Grip registration (or “Option” as it’s called there) can be very useful for the following use cases:
- Paid for sessions. An Organiser is looking to charge for this session / workshop and Grip registration allows you to sell / up-sell tickets for these workshops as part of the process of buying a ticket for the event.
- Attendee interest. Given registration usually is available long before the Grip App launches, showcasing key sessions during registration can give organisers an indication which ones are going to be more popular, helping with planning and right-sizing the auditorium.
- Round table meet-ups. Using each session as a table and having attendees choose a table to meet up around a particular topic. (Currently not an option as these would ideally be private sessions, however registering for a private session via Grip Registration is currently not working)
Content: Why can’t I add sponsors or speakers in a different language?
English is the master / base language - sponsors, speakers, exhibitors etc. can only be deleted or created in the base language. This will create a copy of that content asset in any configured language. The copy will need to get its own image and any description / title needs to be localised in the target language (this has to be setup already)
Localisation: How can I safely re-set the “child” languages to create a new updated copy from the English master?
When a language “child” is created it takes a snapshot of the then current content / pages / ordering / pages / registration form fields / logic etc. and creates a copy. It’s important to get the timing right on this as most content / image assets and form logic should be setup before the localisation task is done (a bit like wayfinding in expoFP) you don’t want to do it too early before the floorplan is pretty much finalised. If a language copy was created initially (e.g. as a preview / to help the translator etc.) then the best and fastest way to get localisation updated is to delete the existing localisation and re-creating a new copy based on the then current version. This is done by going to General→ Essentials and choosing the non-english language followed by going onto the cog next to the language toggle which gives an option “Delete translation”.
Check Ins: Can an organiser check attendees into sessions (and what about sponsored sessions)?
Grip Reg allows attendees to be checked into individual sessions. For this to work the session must be created in Grip Reg under Tickets → Options. (You need to create a group first (group = track in Grip as this is mandatory in Grip)
Any Sessions you create here will:
a) Show up in Grip as a session (with a track and a location if you’ve created a stage / conference room etc.)
b) Show up on the registration form (unless you hide the options by setting them to sold out or making them visible only to a certain ticket type)
c) When a user signs up for a session this is automatically added to their “My Schedule” in Grip
Once the user has received their ticket this will include a QR code (which is also in their mobile app as the My scan QR code) this can be scanned by the organiser staff at the entrance to the session.
Using the scanning functionality with idloom (webapp) you can choose which session you’re going to be “scanning in” for and then scan the badge or the QR code on the user’s app. A green light will indicate the users is registered for the session. (See image below)
.png?width=500&height=315&name=image%20(14).png)
Users who are not registered for a session can be scanned and “force entered” into the session using a simple toggle in the scanning app.
Currently sponsored sessions that are using scan-in are not automatically added to Grip Teams as a lead (this is the behaviour on virtual events where attendees of a virtual sponsored sessions are automatically registered as “interested” for the session sponsor and show up in their lead funnel for qualification).
Check Ins: Can either be open or capped to specific ticket types and/or session registration status/wait list status?
No - Sessions can be made (in)visible in Grip Registration for certain ticket types and same can be configured in Grip based on a data-type. (Note: that there’s currently no 2-way sync between Grip Reg and Grip for session level reservations. So, if you add a session to “my schedule” in Grip that doesn’t save you a seat - this only can be done within Grip registration. People who have pre-registered in Grip Reg would show up as “green”, whereas users who added to “my schedule” in Grip will show up “red”.
Waitlist. idloom has this article on how their waitlist works. In a nutshell people select a “add me to waitlist” for any sessions that are sold out and they will get an automatic email + link to modify their registration when more seats / capacity is made available on any session that has a waitlist. In order to prioritise VIPs the solution would be a manual email campaign to VIPs that is sent out right after the additional capacity has been added, and before the automated email goes out to everyone. That way they can get VIP’s a head start on grabbing any new seats.
Check Ins: Can I use the Grip QR code as a mobile ticket with the idloom Scan-In functionality?
Yes this is supported! You can use the QR code that is generated from the scan_id in Grip and shown e.g. on the mobile homescreen as the code that’s scannable by a third party access system (e.g. fielddrive) or using the built in system by idloom. To enable this you must set “QR code for external check-in system (using attendee UID)” in Content → Automatic Emails.
Check Ins: Can I get a report for multi-day events who showed up on which day?
In short this is not an out of the box report. The best way to do this is download the check in data as a spreadsheet at the end of day one. Then at the end of day1 reset all checkins (see screenshot below) which will delete and reset the checkin data and then re-check the person in on the second day. After the event the files can be combined and the timestamps for checkins by users on various days can be used for pivot analysis.
.png?width=500&height=499&name=Untitled%20(9).png)
Legal & Compliance: Are any 3rd party tools integrated into idloom which transmit PII to 3rd party servers in 3rd countries outside of the EU?
idloom system currently uses Google Fonts in the Cloud and Google Recaptcha. For both tools, the IP address of the web visitor is sent to Google server (but no other personal data), having legal implications GDPR wise.
For that reason, we are updating our systems to:
- Host Google Fonts locally in our servers
- Provide alternatives to Google Recaptcha (e.g. allowing visitors to switch off the tool - other measures are already protecting from spamming bots or implementing a paid European alternative tool like Friendly Captcha)
Multi-Reg: Can one person buy multiple tickets (e.g. a PA for their executive team etc.)?
idloom system has an option under “Tickets → Settings” where multiple purchases by one person can be enabled:
.png?width=500&height=205&name=Untitled%20(10).png)
Note that any other settings e.g. unique email, individual options (e.g. different workshops), capacity limits, networking preferences etc. are required to be filled in for each ticket that is purchased in one “batch”. The batch then shows up as a grouped registration in the Attendee List like this:
.png?width=500&height=105&name=Untitled%20(11).png)
Multi-Reg: Can one person buy an empty ticket and assign it to a staff member to fill in their ticket details (like Tito allows)?
idloom does not directly allow for this option, however the person buying multiple tickets will receive an email with an admin link (tokenised) which, if enabled in the configuration under “Registration → Settings”, will allow subsequent edits / modifications to their ticket.
.png?width=500&height=219&name=Untitled%20(12).png)
This would allow a PA to buy a ticket and assign it to him/herself only to be modified and assigned to the final recipient at a later stage.
Payment & Discounts: Which payment gateways are supported on idloom?
- Authorize.Net
- Adyen
- Bambora
- CASHNet
- Crédit
- Agricole
- CCV
- Elavon
- Elavon US
- Globee
- HiPay
- Ingenico
- Mollie
- Payflow
- Paypal
- SagePay
- SIX Payment
- Stripe
- VR Payment
Payment & Discounts: How do discount codes with limited inventory work in combination with multi-buy tickets?
If you have a discount code with limited numbers available, and combine this with a multi-ticket purchase there’s two variations:
- you allow multiple tickets to be purchased by one person:
In this instance one coupon will allow you to apply the discount to all the tickets that are purchased as part of the order. Example you have tickets at a regular price of $150 and a single 50% discount code - with a person buying 2 tickets using one coupon code this will result in a total cost reduction of $150 (2x $75).
- you allow several consecutive registrations by the same registrant:
In this instance once coupon will only allow you to buy one discounted ticket (assuming the available coupon quantity is 1). Example you have tickets at a regular price of $150 and a single 50% discount code - with a person buying 2 individualised tickets using one coupon code this will result in a total cost reduction of $75.
Ops / Technical: How do I setup custom domains for both Grip Reg and Grip Engage?
To do this you need a total of 4 subdomains:
- Grip web -> Amazon AWS - e.g. networking.xxx.com
- Grip Email -> mailgun e.g. messages.xxx.com (for tracking and stats)
- Idloom web -> idloom hosting e.g. registration.xxx.com
- idloom Email -> emailr e.g. tickets.xxx.com
Ops / Technical: How do I setup a custom email / web domain for client in idloom?
Prerequisite: Customer has existing website and DNS domain registered.
REGISTRATION
e.g. https://registration.future.works
registration.future.works. 300 IN CNAME waf.idloom.com.
e.g. registration.future.works
Following DNS entries must be made on client side:
registration.future.works MX 10 by.emailr.com.
Only one SPF record per domain, so amend existing one, if any, with include instruction only "include:inc.emailr.com"
registration.future.works TXT "v=spf1 include:inc.emailr.com -all"
You may need to escape ";" for BIND DNS server syntax. "\;" i.o. ";"
id.domainkey TXT "v=DKIM1; k=rsa; p=xxx_public_RSA_Key"
_domainkey TXT "t=y; o=~;"
Only one DMARC record per domain. Update "p=none" to "p=quarantine" or "p=reject" for tighten delivery rules.
_dmarc TXT "v=DMARC1; p=none; sp=none"
Ops / Technical: How do I setup a quick-login link from Grip Registration → Grip Engage / Platform?
Note: This normally would have to be done on a dedicated queue as otherwise the link will not work if there’s a delay beyond 2s from registration confirmation to thing being created in Grip.
To enable the linking we adjust the copy of the confirmation email under: Content → Automatic Emails
Ensure you add this into the <SOURCE> editor and Do Not Edit with WYSIWYG Editor after (this will break the URL by replacing URL with encoding)
https://matchmaking.grip.events/safeisrisky/event-login?badgeid={%guest_uid%}&email={%email%}&auto=true