How to create a pre-filtered Event Agenda
This guide will help you create a pre-filtered event agenda, making it easier for your participants to navigate sessions based on specific criteria.
You’ll also learn how to add this pre-filtered agenda to your event homepage, ensuring it’s accessible on both web and mobile platforms.
In this article, we will cover:
- How to create a pre-filtered event agenda
- How to add a pre-filtered event agenda to your homepage
- FAQs
How to create a pre-filtered event agenda
Before you start, make sure you've already created your sessions. If you need help with that, check out our Event Agenda article for detailed instructions. This will give you the foundation you need to create a pre-filtered event agenda.
-
Go to 'Event Details':
- Head over to the 'Event Details' tab and click on 'Navigation.'
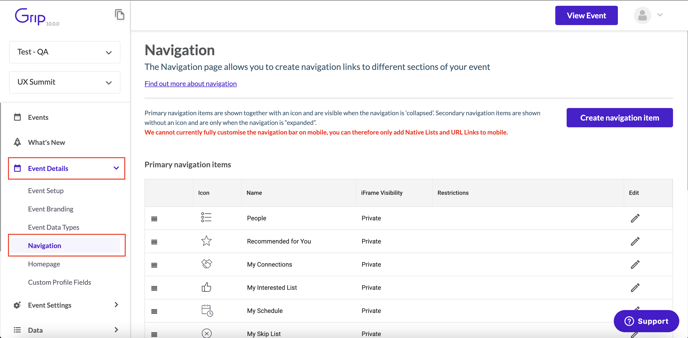
- Head over to the 'Event Details' tab and click on 'Navigation.'
-
Create a Navigation Item:
- Click 'Create navigation item.'
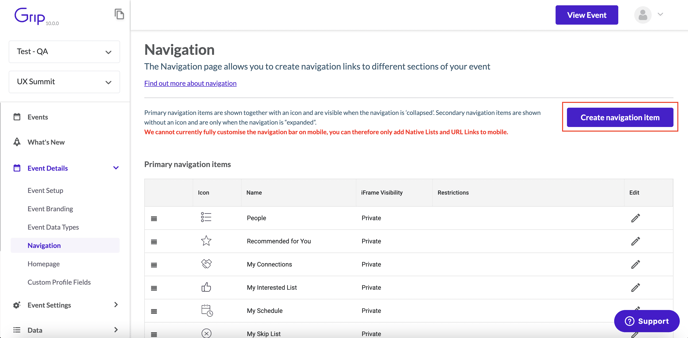
- Click 'Create navigation item.'
-
Name and Place Your Navigation Item:
- Enter a name for your pre-filtered agenda.
- Choose where to place it ('Primary' or 'Secondary'). Primary items will appear at the top of the navigation bar, while secondary items will show below without an icon.
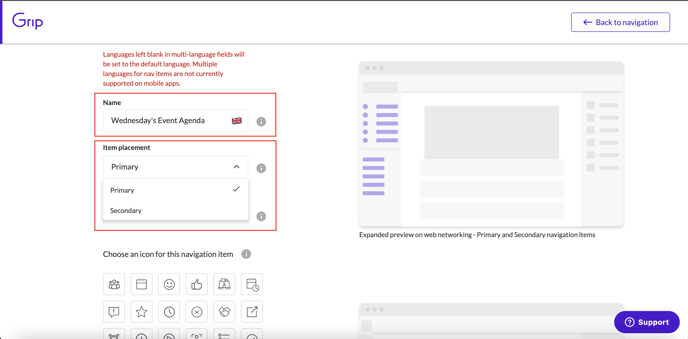
-
Select the Item Type:
- Choose 'Event Agenda' as the 'Item Type.' This will allow you to filter the event agenda by date, track, stage, or any session custom fields. Learn more about creating tracks, stages, and custom fields here.
Note: You’ll see all available session filters here, including those you may have turned off in the Event Setup page. This gives you flexibility to customize the pre-filtered agenda without showing unnecessary filters to participants.
- Choose an Icon:
- Select an icon for your pre-filtered agenda.
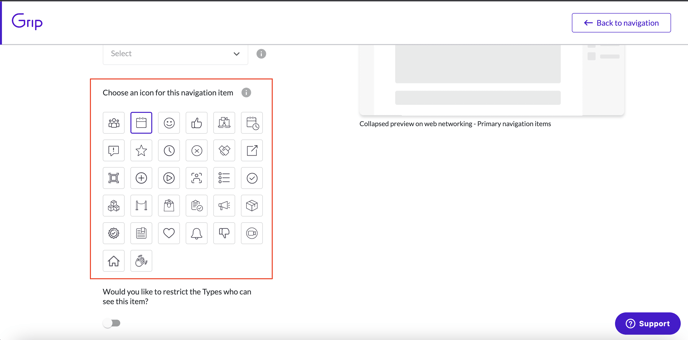
- Select an icon for your pre-filtered agenda.
- Set Visibility Options:
- Decide if you want the pre-filtered agenda to be visible on web, mobile, or both.
- You can also restrict visibility based on Data Types.
- The name of the pre-filtered Event Agenda will be inherited from the 'Navigation item' name you set.
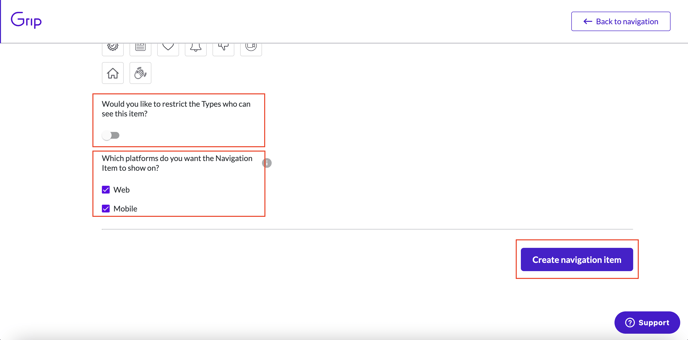
- Create the Navigation Item:
- Click 'Create navigation item' at the bottom right of the page to save your settings.
How to Add a Pre-Filtered Event Agenda to Your Event Homepage
-
Access the Homepage Settings:
- Click 'Homepage' under the 'Event Details' tab in your dashboard.
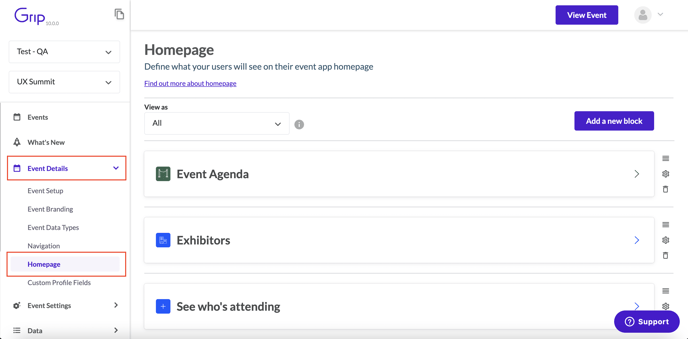
- Click 'Homepage' under the 'Event Details' tab in your dashboard.
-
Add a New Block:
- Click 'Add a new block' at the top right of the page.
-
Choose a Quick Link Type:
- Decide how you want to display your event agenda on the homepage (Icon block, Text & Icon block, or Image block). For this example, we'll use a Text & Icon block.
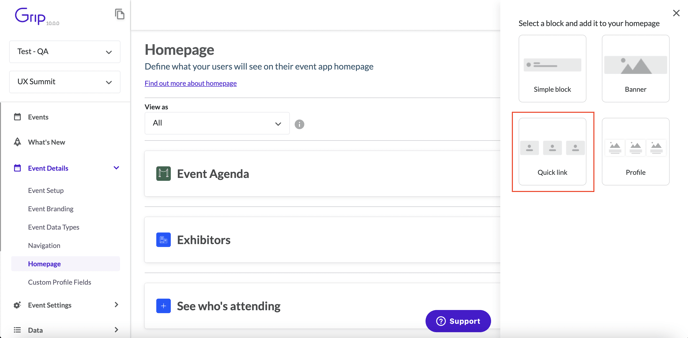
- Decide how you want to display your event agenda on the homepage (Icon block, Text & Icon block, or Image block). For this example, we'll use a Text & Icon block.
-
Customize the Block Appearance:
- Set the block title, title color, background color, icon color, and description color.
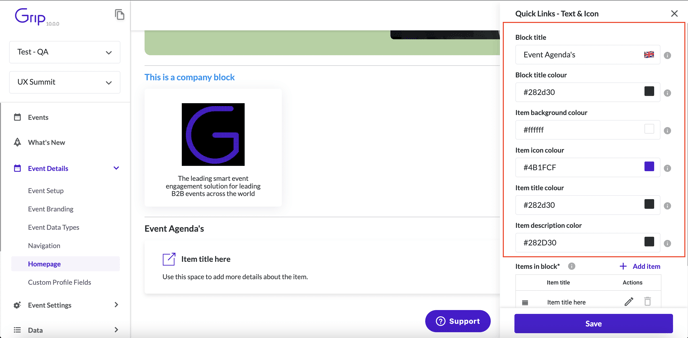
- Set the block title, title color, background color, icon color, and description color.
-
Edit the Block Item:
- Click the pencil icon to edit the item within this block.
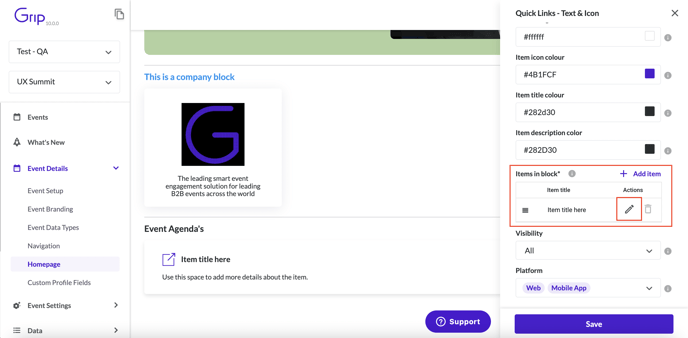
- Click the pencil icon to edit the item within this block.
-
Link to Your Event Agenda:
- Choose the item title (translatable) and description text (translatable).
- Under 'Where would you like to link to,' select 'Internal page.'
- In the 'Internal page' dropdown, select the event agenda list you created in navigation items.
-
Select an Icon and Save:
- Pick an icon for the block and click save.
-
Set Visibility Options:
- Decide who should see this homepage block and on which platforms (web, mobile, or both). Click save to finalize.
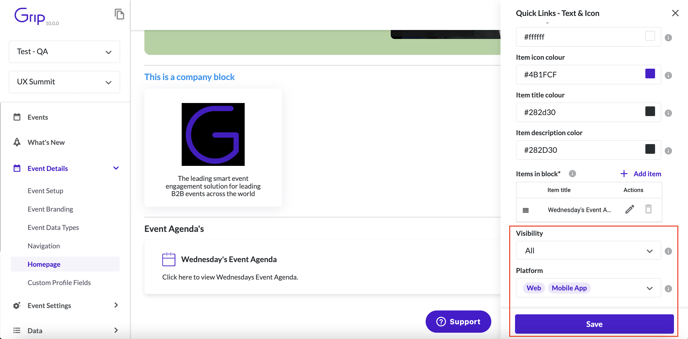
- You’ve now successfully created a pre-filtered event agenda homepage block.
- Decide who should see this homepage block and on which platforms (web, mobile, or both). Click save to finalize.
FAQs
Can participants remove the filters when they click on a pre-filtered event agenda?
No, participants can't remove or edit the pre-filtered options, but they can add additional filters to further refine the agenda. For example, if an agenda is pre-filtered by date to show only Day 1 sessions, participants won’t be able to change the date but can apply other filters, such as session stage or track, to narrow results further.
Are Event Agenda names translatable?
Yes, you can translate the names to accommodate different languages.
Does a pre-filtered Event Agenda have to be linked to a Quick Link or Banner block?
Yes, you need to link a pre-filtered event agenda to either a Quick Link or Banner block for it to appear on the homepage.