To create visually appealing branded user guides using Figma, you can follow the steps below. By following these steps you can create comprehensive and user-friendly guides that will enhance the overall event experience for all participants.
What You’ll Need:
- The Participant Guide template in Figma
- A Figma account (Free version works)
- 3 event graphics:
- Home Banner (128 x 57 px AND 1440 x 600 px)
- Event Banner (115 x 35 px)
- Event Logo (55 x 55 px)
- Event Hex Color
1. Getting Started
🎨 Template
To start a new project in Figma, click on the User Guide Template provided above. Within the same file, you'll find Instructions and Participants guides in the left-hand navigation bar.
Click Open in Figma in the top right corner.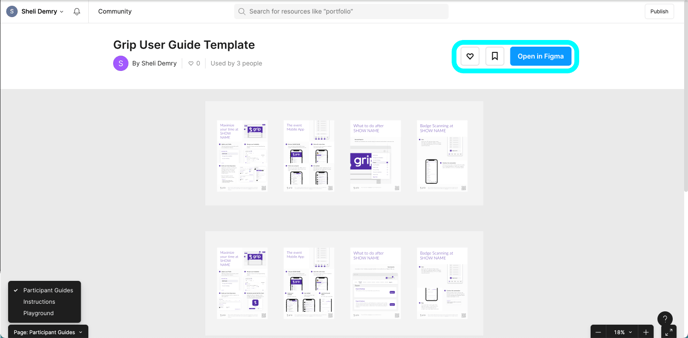
2. Upload and Resize Assets
To add the branding to your new Figma file, drag and drop the appropriate assets or files from your computer into the Figma canvas you created in Step 1, into any of the grey spaces.
⚠️ Do not drop or add the graphics into the white Instructions area.
Ensure you have 2 graphics for the Home Banner as you will utilize two sizes of this particular graphic. You can copy and paste from within Figma or drag and drop that file twice. Select the image and on the right Design menu, you will find the option to set the width (W) and height (H). These by default will be locked proportionately, which is what you want to leave. Set the dimensions to approximately what is indicated in the instructions for each of these assets. It is better to have the images be slightly larger than indicated, than too small. Repeat this process for all 4 graphics.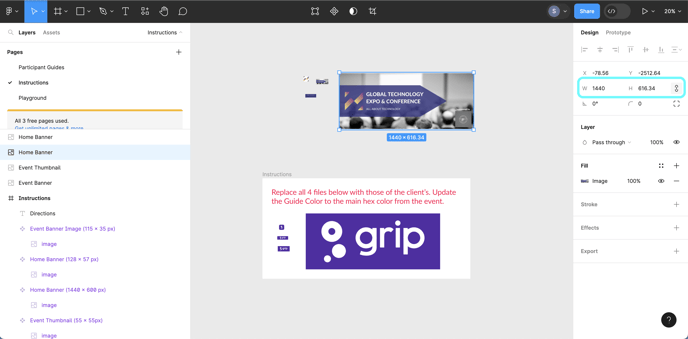
3. Replace Template Assets
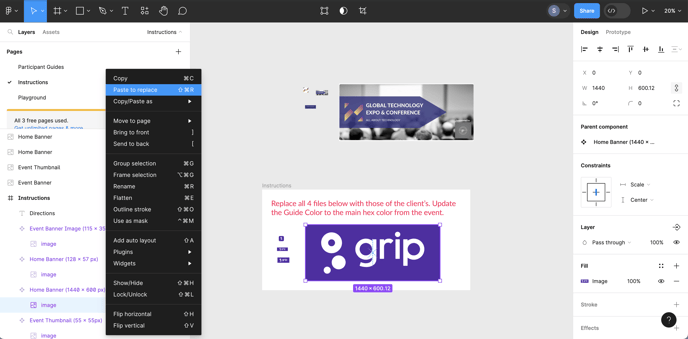
Once the dimensions are set, copy the image and select the appropriate “image” under the respective graphic on the left menu. For example, if you’ve copied the Event Home Banner at 1440 x 600 px, copy the “image” under that particular graphic’s heading. Right-click and choose the option “Paste to replace”, or paste it from the keyboard using the Shift + Command ⌘ / CTRL+ V keys. *Repeat this process for all 4 graphics. You will then notice that your user guides have changed from the Grip standard branding to the branding of the event.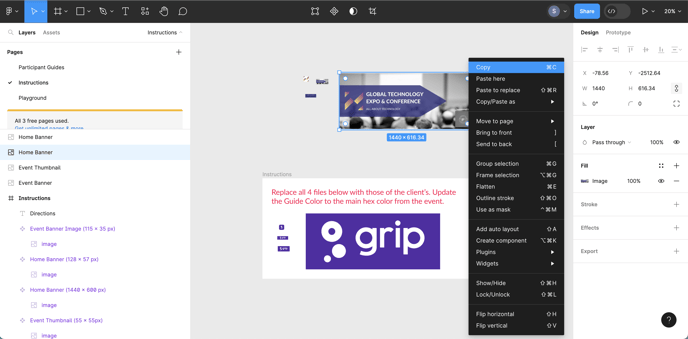
4. Update Colors
It's important to ensure that the colors perfectly match the hex colors of your specific event. To do this, simply head to the right-hand side of the Instruction file and look for the menu titled “Color styles”. Click on the Guide Color item and select the "edit style" adjuster button beside it. A new window will pop up with a properties pane where you can paste the event’s Hex color. This will update all accent colors to your event’s Hex color.
5. Update Event Name
Finally, ensure that you include the name of your event within the pages of the User guides. To do this, access the Participants Guides from the left navigation menu and press the Command ⌘/ CTRL + F keys on your keyboard. Type “SHOW NAME” into the search bar. This will highlight the "SHOW NAME" holder text in yellow. In the Replace with… field add your event’s name. *Once you have entered the name, click the "Replace all" button to apply the change to all fields, or use the “Replace” button to adjust one-by-one if you’d like more granular control of the text.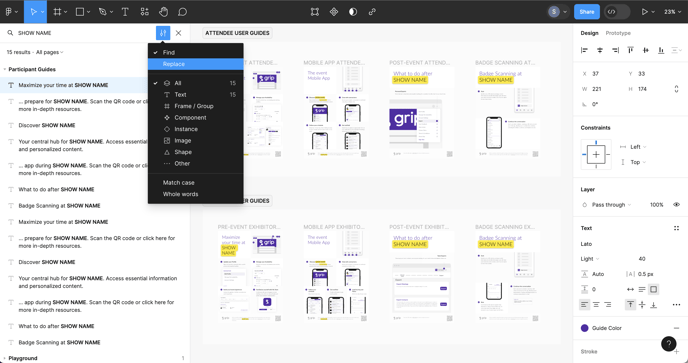
6. Export
Once you are happy with the changes you have made, you can export your user guides.
Select the pages you want to export in the left Layers navigation menu. *Be sure to select the individual pages and not the entire section at once. You can choose to export specific ones rather than all of them if you’d prefer.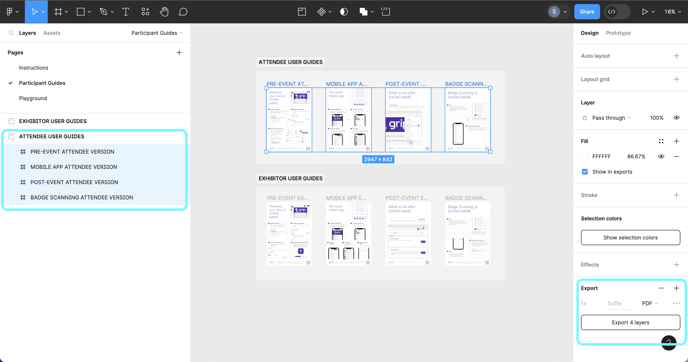
From here you can select the format you want to export the file, such as PNG, JPEG, SVG, or PDF. We recommend the user guides to be exported into a PDF file. Click the “Export” button at the bottom-right corner of the screen once you’re happy with your selection.
After the export is completed, you’ll see a ZIP folder in your download (or a single file if you’ve chosen to export page-by-page). Once you unzip the folder you can see the individual pages of the participant guides.
7. Merge Files (optional)
If you’d like to combine them into a single file, you’ll need to merge the pages. You can use a website like iLovePDF to do so.
To merge the pages you downloaded into one PDF file, use the website and upload the desired pages. Once the pages are merged, download the file and re-name it to your preference. We suggest either “Event Name Attendee User Guide” or “Event Name Exhibitor User Guide” for example.