Within the Grip Engage Admin, there are three Data Type categories: Participants, Companies, and Items. Once your Data Types have been created, navigate to the Data tab in the navigation bar. You will see these three categories, each with your specific Data Types listed underneath. When you click on a Data Type under either Participants, Companies, or Items, you will be directed to their respective profile page.
In This Article, We Will Cover:
- Overview of a Participant Profile Page
- Overview of a Company Profile Page
- Overview of an Item profile page
- FAQs
Before getting started, make sure you have selected the app and event in the top left corner of the screen. This ensures you're viewing profiles specific to the event.
Tip: If you don’t select an event, you won’t see all the features available for the profiles.
Overview of a Participant Profile Page
Viewing a Participant Profile
To view a participant profile, click on the Data Type you have created under the Data > All > Data type of that participant category. Profiles that belong to that data type will automatically appear. You can either search by email, name or other profile properties, or choose from the list and do bulk actions.

Profile Information: Upon entering a participant’s profile page, you will land on the Profile tab. Here, you can view and edit the 'Basic Profile Information' section. This includes:
- Profile picture
- Participant's name(s)
- Headline
- Job title(s)
- Company name(s)
- Location
- Preferred language in the platform
- Badge scan ID
Headlines Limit: 140 characters. We recommend keeping headlines within 15-20 characters to capture attention effectively, allowing users more time for productive meetings. Typically, Grip structures the headline as "Job Title at Company."

Summary Section: Next, you can view, input, and edit the 'Summary' field, displayed on the participant's profile within the event platform.
Summary Limit: 2,000 characters. To ensure optimal visibility, we suggest keeping the summary within 150-200 characters.

Contact & Login Details:
On the right-hand side, under Contact & Login Details, you’ll find the participant's email, registration ID, and phone number. The email and registration ID are especially important for first-time logins, as participants will use these details to access the platform and set up their permanent password.
Contact Details Visibility: If contact sharing is enabled, you can view the participant’s chosen visibility settings (e.g., Disabled, Connections, Private, Public).

Additionally, you can manage login settings here:
- Reset Password: Allows you to reset the participant's password and login details.
- Reset Onboarding Status: If you reset the onboarding status, the participant will see the onboarding screen and can go through the onboarding flow again the next time they access the event.
- Reset Login Settings: Resetting login settings makes the participant inactive and requires them to log in again and set a new password. However, please note that the participant's status label on the Grip Engage Admin will still display as "Active." Resetting login settings does not reset the onboarding status.
Basic Profile Information:
- Created: [Date the profile was created]
- Last Updated: [Date the profile was last updated]
- Status in Event: Displays as either Active or Inactive.
Login Activity:
Under Logins, you can view the date and time of each login based on your local time zone. If the participant hasn’t logged in yet, you will see "Never" displayed.
- Web: [Date and Time or "Never"]
- Android: [Date and Time or "Never"]
- iOS: [Date and Time or "Never"]
Data Type:
- Type System Name: This is the internal name displayed on the Grip Engage Admin.
- Type Display Name: The name visible to users on the event platform.
- Type Category: Identifies whether the type is a participant, company, or item.
Events Attending: A list of events that the participant has been added to.
Custom Groups: Displays any custom groups the participant is part of. This is particularly important for MustMeet events and helps display participants within lists on the event platform.
Teams: Shows the team name if "My Team" has been activated for the participant.
Actions: Under this section, the following actions can be performed:
- View user activity Data: Access detailed insights on user interactions, including meetings requested, meetings received, connections made, recommendations and sessions attended.
- Set meeting availability: Adjust and manage availability for meetings.
- Create manual swipes: Manually match or swipe participants.
- Send a Single Email: Send individual emails to users directly.
- Note: If no email campaigns have been created, you’ll need to first create a campaign on the "Emails" page. From there, you can send single emails too.
- Regenerate Recommendations: Refresh and update participant recommendations.

Custom Fields: Below the summary section, you can view and edit the participant’s Custom Fields. For more information on Custom Fields, click here.
-gif.gif?width=600&height=384&name=ScreenRecording2025-02-20at16-30-36-ezgif-com-video-to-gif-converter%20(1)-gif.gif)
Website and Social media links: A space for all the links this participant is able to add. All of them can be manually deleted or edited through Grip Engage Admin, if needed.

Relationships Section: This section displays the Exhibitor ID when you add a company relationship. For MustMeet events, if you're viewing a profile that's part of a MustMeet group, you'll also see the Sharer ID field here, in order to manage Sharer relationships.
- To add a company relationship, click Add Company Relationship. A pop-up window will appear, allowing you to select the relationship type and the associated company.
- To add an item relationship, first there must be items connected to your company. This is easily done through the company profile, instead of participant's profile.
- For participant relationship to be presented in this area, a given participant must first be associated with another participant profile. (This is done by enabling sharer relationship within particular data type)
 Sessions Section: This section shows the sessions the participant is speaking at and attending (added to their schedule). You can click on the Session name to open it in a new tab. Once you have made the necessary updates, click Save Changes at the bottom right of the page.

Settings tab
After saving the changes in Profile tab, proceed to the Settings tab at the top left of the page.
Promotion Section: The first section displayed under Settings is the Promotion section. Here, you will find toggles for the featured label, email footers, top of lists, and adding to the featured section (web). 
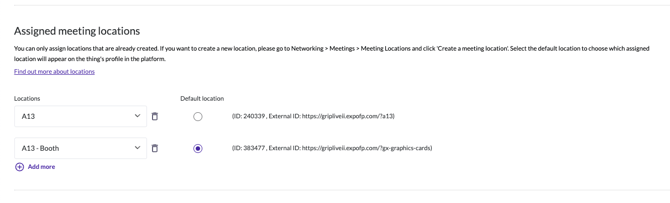
Assigned Meeting Location: In this section, you can set the participant's default meeting location, such as a booth assigned to an exhibiting company, a specific room at an event venue, or an online room. These locations are set up in the Meeting Locations page within the Grip Engage Admin.
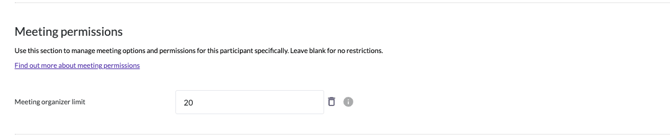
Meeting permissions: Every organizer can manage meeting options and permissions for every individual participant. If there are no limits of meeting permissions, everything shall be left blank.
Unstructured Profile Data: This section shows how the profile is linked throughout the Grip Engage Admin.

Advanced Settings: In this section, you will see:
-
- Is in Search Index: Indicates whether this profile appears when searched.
- Profile Contains Enough Information to be Recommended: Indicates whether this profile has sufficient information to be recommended.

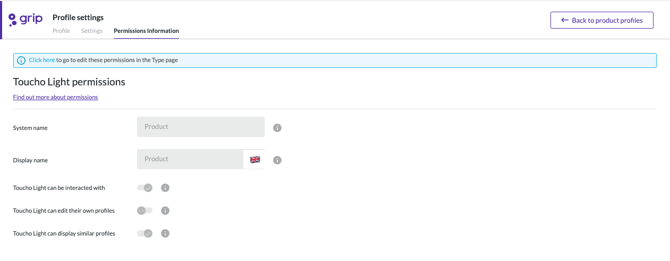
Permissions Information tab
The final section on the participant profile page is Permissions Information. This section displays the permissions of the Data Type your participant is in. Permissions can be changed on the Event Data Types page. Click here to see our article on the Event Data Types page.
(Bear in mind, if this datatype belongs to a custom group with different permissions - custom group permissions overrule).
-gif.gif?width=600&height=425&name=ScreenRecording2025-02-20at16-58-46-ezgif-com-video-to-gif-converter%20(2)-gif.gif)
Overview of a Company profile page
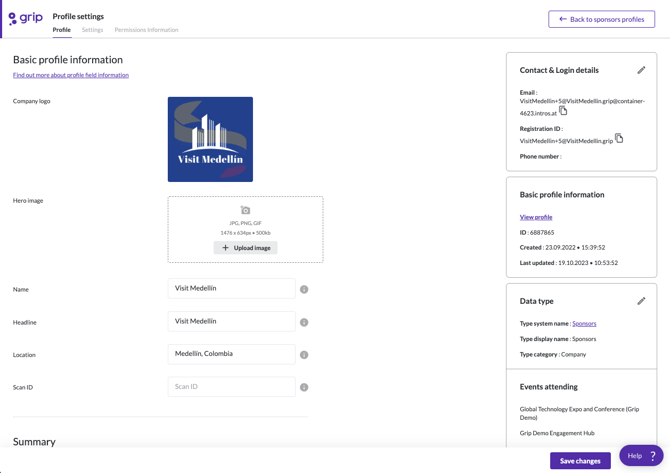
A Company profile page closely resembles a Participant profile page, allowing similar customization options. On a Company profile page, you can:
- Add a Company Logo: Recommended size is 1000x1000px.
- Upload a Hero Image: This banner appears on the company’s profile within the event platform. The recommended size is 1476x634px.
- Enter the Company Name and Headline.
- Set the Location and Scan ID. These fields are optional.
- Provide a Summary: Offer a brief description of the company.
- Customize Custom Fields: Include any additional details specific to the company.
- Manage Relationships: You can add 'Participant relationships' and 'Item relationships.'
After making the necessary updates, click Save Changes to apply them.
To adjust settings, click Settings at the top left of the page. This section mirrors the settings available on a Participant profile page. Once you’ve made the necessary adjustments, click Save Changes.

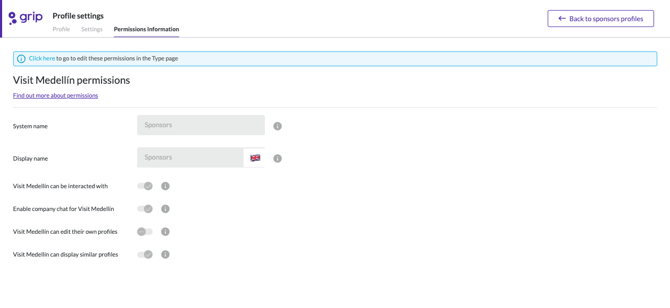
At the top left of the Profile settings page, click Permissions Information. Within a Company profile, you will see fewer permissions than those available on a Participant profile. These permissions can be edited on the Event Data Types page in the Grip Engage Admin.
Overview of an Item profile page
Item Profile Overview: An Item profile page is nearly identical to a Company profile page. The main difference is that you can add up to 10 item images, and you can only add a Company relationship.
Settings: Click Settings at the top left of the page. This section is identical to the settings section of a Company profile page. Once complete, click Save Changes.

Permissions Information: At the top left of the Profile settings page, click Permissions Information. Similar to participant and company permissions, item permissions can be edited in the Event Data Types page in the Grip Engage Admin.
Frequently Asked Questions (FAQs)
Q: Can I add multiple logos to a Company profile?
- A: No, only one company logo can be added per Company profile. The recommended size for the logo is 1000x1000px.
Q: Is it possible to set a default meeting location for participants?
- A: Yes, you can set a default meeting location for participants in the 'Default Meeting Location' section of the profile settings. This location could be a booth, a specific room at the event venue, or an online meeting room.
Q: How do I add a Participant relationship to a Company profile?
- A: To add a Participant relationship, go to the 'Relationships' section of the Company profile page and click on 'Add Participant Relationship.' Then, select the participant and define the relationship.
Q: Can I upload multiple hero images to a Company profile?
- A: No, only one hero image can be uploaded per Company profile. The recommended size for the hero image is 1476x634px.
Q: What is the maximum character limit for headlines on a Participant profile?
- A: The maximum character limit for headlines is 140 characters. However, we recommend keeping headlines within 15-20 characters to effectively capture attention.
Q: How do I edit the permissions for a Data Type?
- A: Permissions for Data Types can be edited on the 'Event Data Types' page in the Grip Engage Admin. This allows you to control what each Data Type can access or modify.
Q: Can I add item relationships to a Participant profile?
- A: No, item relationships cannot be added to a Participant profile. Item relationships are managed through Item profiles and Company profiles.
Q: What should be included in the Summary section of a Participant profile?
- A: The Summary section should provide a brief overview of the participant, ideally between 150-200 characters. It appears on the participant’s profile within the event platform.
Q: Are there any restrictions on adding Custom Fields?
- A: While there are no strict restrictions on adding Custom Fields, it’s recommended to keep them relevant and concise to maintain clarity for users.
Q: How can I view all sessions a participant is involved in?
- A: You can view all sessions a participant is speaking at or attending in the 'Sessions' section of their profile page. This includes sessions they have added to their schedule.
Q: Can I disable the "Job Title" and "Company Name" fields separately while allowing users to edit other profile fields?
- A: Yes, organizer can enable and disable profile editing in a granular way, at data type leve. Read more about it in our Event Data Types page article.
Q: I can't see the sessions that I'm speaking at when I view my own profile. Is there something wrong?
A: Not to worry, this is how the platform is designed! When you view your own profile, the sessions you've added won't be displayed. However, other users can see them when they view your profile.