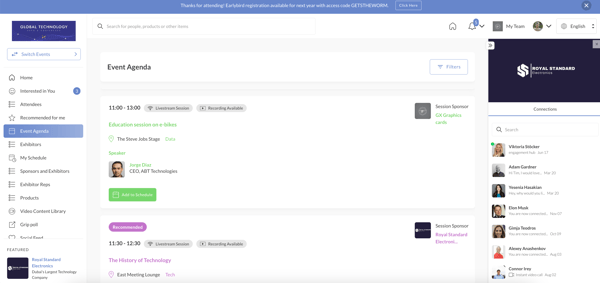
The Event Agenda page in the Grip Engage Admin is designed for event organizers to create, manage, and store all session content for their event. From standard sessions to webinars, roundtables, and speed networking formats, the Event Agenda is the central place where all session types are configured and maintained.
This article provides a detailed overview of the Event Agenda page and how to use it effectively within the Grip Engage Admin.
In this article we will cover:
- Sessions
- Locations
- Tracks
- Session roles
- Settings tab
- How to create a session
- Webinars
- Roundtables
- Speed Networking sessions
- Editing a session
- FAQs
The Event Agenda page can be found under the "Event Details" tab in the Grip Engage Admin Portal. It is simple to navigate, with five main sections at the top: Sessions, Locations, Tracks, Session Roles, Settings and Attendees.
What types of sessions can I create in the event agenda?
In the Event Agenda, you can create the following session formats:
-
Standard Session: A traditional conference session, typically listed in an event program.
-
Virtual Roundtable: An interactive session where all attendees can actively participate in discussions.
-
Speed Networking: A virtual networking session designed for quick, consecutive 1:1 meetings, where attendees are randomly matched for short conversations.
How to create and manage locations in the event agenda
Location and tracks are essential components of your event agenda setup. Both a location and a track are mandatory when creating a session, as they determine where the session takes place and how it is categorized for event participants.
What are locations?
Locations represent 'where' your session is happening. These may be physical places for in-person events or virtual stages for hybrid and online events. Locations can be created in advance or during session setup.
⚠️ Note: Every session must be assigned a Location.
In the ‘Creating location’ paragraph, added:
-
Go to the "Locations" tab in your event configuration.
-
Click Create a Location in the top-right corner.
-
Enter the Location Name. For multi-lingual events, click the flag icon to add translations.
-
(Optional) Add an External Location URL (e.g., from ExpoFP) to link the location to a floor plan.
-
Once settings are complete, click Create Location or Save.
-
Once the location is created, simply drag and drop rows within the Locations table. This order will be reflected in the filters on both web and mobile, making it easier for attendees to navigate your agenda based on priority or relevance.
🔎 Note: Reordering locations only affects their display in filters, not the session order, which remains chronological or based on search relevance.
Configuring location settings
-
Main Stage: Choose whether this will be the event’s Main Stage. Only one can be designated per event. Sessions on this location appear under the "Main Stage" tab in the agenda.
-
Maximum Capacity: Enter a limit if this location is tied to a physical location with restricted seating.

Enabling location chat
-
Location Chat: Toggle on to allow participants to chat with each other in a single long-running chat, throughout the length of all sessions on this location.
-
Pre-Moderated Chat (optional): Enable this to review messages before they appear, useful for sessions with sensitive topics or high-profile speakers.

Optional: embed audience interaction tools
Enable this option to embed tools like Slido or Conference.io. When active, attendees can access Q&A or polls directly from the session sidebar.
Promoting the location to the homepage
You may choose to promote a single location to the homepage. This will highlight sessions from that location at the top of participants’ home feeds during live sessions.
Once all settings are complete, click Create location or Save.
How to create and manage tracks in the event agenda
What are tracks?
Tracks organize sessions by theme or topic (e.g., Artificial Intelligence, Sustainability, Marketing), helping event participants filter the agenda and find relevant sessions.
⚠️ Note: Every session must be assigned a Track.
Tracks are also very useful as they can restrict sessions to specific participant types—for example, to limit VIP or sponsor-exclusive content.
Creating a track
-
Navigate to the Tracks page.
-
Click Create a Track to open the configuration sidebar.
-
Enter the Track Name. For multilingual events, click the flag icon to add translations.
-
Choose a Track Color to visually distinguish it in the Event Agenda.
-
Click Save to finalize the track.
-
Once the Track is created, simply drag and drop rows within the Tracks table. This order will be reflected in the filters on both web and mobile, making it easier for attendees to navigate your agenda based on priority or relevance.
🔎 Note: Reordering tracks only affects their display in filters, not the session order, which remains chronological or based on search relevance.
Example: A ‘Tech’ track might be purple, while a ‘Data Science’ track could be green—helping users visually navigate your agenda.
Session roles
Every event is unique, even down to how you refer to the people who present in your sessions, so we've given you the ability to customize session roles. Session (or contributor) roles might include sponsors, hosts, moderators, panelists, conference chairs, etc.
Head over to the "Session roles" tab if you want to create, update, or delete existing session roles. Session roles are created at the event level, which means that all roles you create for one session will be shared across the whole event agenda.

Note that a session contributor can only have a single role within a session. However, the same contributor could have a completely different role in another session.
For example, Tim could be a host on one session and a panelist on another.
Creating a session role
To create a custom role for your event, head over to the “Session Roles” tab on the Event Agenda page.
1. Click on the “Create Role” button, and a new sidebar will appear, where you can create a role name and select role type.

2. Roles are multilingual, and by clicking on the little flag icon, you can change the language to any other supported by the event.

3. Saving the role is as simple as clicking the “Save” button.
Updating a session role
To change the current role name, follow these steps:
- Click the cogwheel button on the right side of the table.
- The sidebar will open again, and you can change the role name in all supported languages. Please note, that you cannot change role type.

Deleting a session role
- Select the role in the table using the checkbox.

- Click on the “Delete Role” button, and a new popup will appear to confirm the deletion of the role.
- Note that you will also need to remove all existing profiles from the role and assign them to another one if you want to delete the role.
- The default “Speaker” role cannot be deleted or edited, and is always automatically created as event in Grip is created.
Settings Tab
Once Sessions, Tracks, Locations and Session Roles have been configured, the next step is to adjust the event-level settings related to session visibility and interactivity.
In this section, you can:
-
Choose whether sessions should be recommended to participants.
-
Enable or disable Live Chat for sessions within the event.

How to create a session
-
Click ‘Create Session’ on the Event Agenda page.
You will have two options:
-
Create a session manually
-
Bulk upload sessions using a CSV template
💡 For most organizers, bulk uploading the full event program via CSV is faster and more efficient.
To learn more, see: Uploading Sessions via CSV Template (link to CSV upload article)
2. In this example, we’ll walk through how to create a session manually.
You will land on the session creation page, where you can begin entering session details.
3. Enter the session name.
-
Session names are translatable for multi-language events.

-
There is no character limit, and names appear on both web and mobile.
-
Click the flag icon to add translations.
4. Select a session format from the dropdown.
The Session Format defines the type of session and determines its behavior in the platform. Use the table below to choose the correct format for your session type and event type.
❗ Only Standard sessions are supported for in-person-only events.
All other formats require a virtual or hybrid setup.
| Session Format Type | Event Type Supported |
|---|---|
| Standard Session | In-person, virtual, hybrid |
| Virtual Roundtable | Virtual or hybrid only |
| Speed Networking | Virtual or hybrid only |
5. Select the start and end date/time, as well as the location and track.
🔒 You cannot create sessions in the past - start times must be set in the future.
5a. Creating a location within the session
If your location hasn’t been created yet, you can create it directly from this screen. Location names are also translatable.
5b. Creating a Track within the session
Tracks can also be created inline and translated for multilingual support.

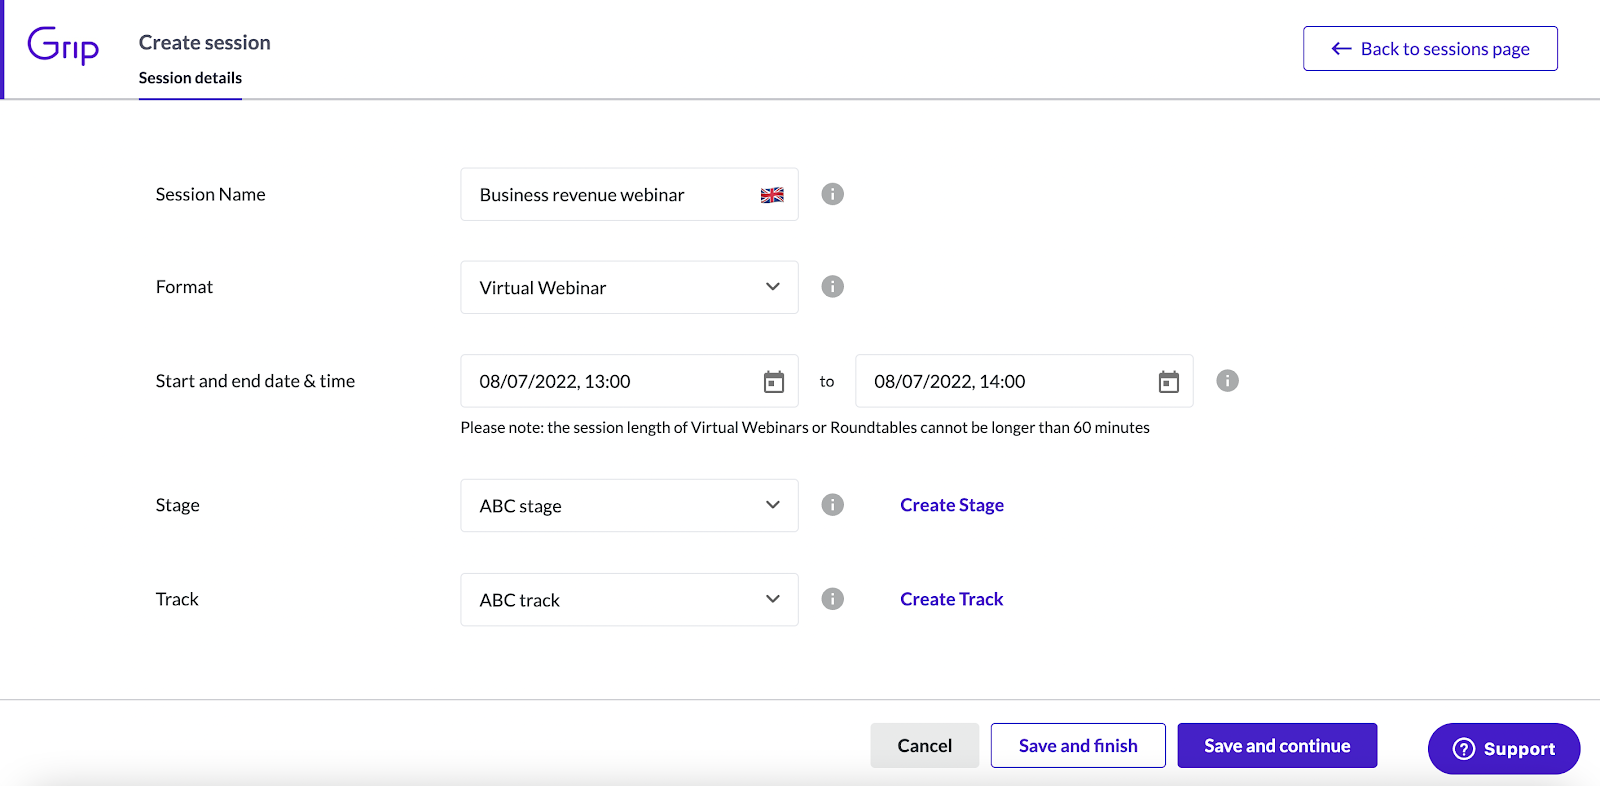
6. After entering the core details, choose between:
-
Save and finish – Saves the session for later editing.
-
Save and continue – Opens additional fields for session configuration.
7. You will still be on the 'Details' page but now there are further fields available, to add more information about your session.
8. Session custom fields. These have an entire tab to themselves, shown at the top of the page. Session custom fields are a flexible way of adding additional data to a Session for viewing or filtering. To configure these, see our main Session custom fields article.
9. Add the session description in the box provided. This is translatable on both web and mobile and there is no limit to the number of characters.
Session description can be a plain formatted text, can contain emojis or be written in HTML with different heading sizes, italic/bold/underlined text to make the session pop.
-Photoroom.png?width=436&height=228&name=Template%20for%20product%20launch%20notes%20(84)-Photoroom.png)
10. If your session has external URL links to show externally provided content, add them here (see image below). For example, to link to a live stream URL, select 'Live Stream URL' and enter the URL of your live stream.
Note: if the session being created is on the Main Stage, it will inherit the stream URL. Additionally, if the session is created on a location where there are Capacity limits, Chat, and Audience Embed set, the session will automatically inherit those settings. If there is an additional conflicting chat or audience embed configured for the session, it will override the location.
Also note that Live Stream URLs and Video Recording URLs are translatable, meaning you can have separate links to the same content in different languages. These are shown based on the participants' language settings.
Types of links you can use:
-
Personalized URLs
- Provide users with tailored information specific to their profile, sessions, or attendance.
-
Website URL
- Adds an external link to the session, opening in a new tab or mobile web browser.
-
Session Content URL
- Creates a button within the session for externally hosted content (e.g., PDFs), which opens in a new tab or mobile web browser.
-
Live Stream URL
- The primary link for your live stream, embedded directly into the session.
-
Video Recording URL
- A link for the session recording, available 30 minutes after the session ends.
-
Polling and Q&A URL
- Adds a button for attendees to access a companion site for polls or Q&A, opening in a new tab or mobile web browser.
-
Audience Interaction URL
- Embeds a link into the right-hand sidebar of the session details page, allowing attendees to interact while viewing the session.
The above link types are all available on both web and mobile, with the exception of the Audience Interaction URL, which is only available for web. For more details about the functionality of any of these links, see this article.
In most cases you only need to specify the URL to be used, along with whether you want to embed the content directly into Grip. In the case of the Audience Interaction URL you will also need to specify a name for the link, which your users will see in the sidebar where that content is loaded.

11a. Select whether you want your session to be private or not. If so, select your Invitees. Note that sessions cannot be private when hosted on the Main Stage of your event, or if you have chosen to display the Session in all participant schedules.
Private Sessions are only visible to the participants that you've added as Invitees here. Once a participant can see that session, they can choose whether to add it to their schedule, the same as a normal session. Due to this distinction, Private sessions are the only sessions that have an Invitee list as well as a list of attendees ('attendees' are those that have added it to their schedule).

Note: You can remove existing Private Invitees using the same field. If you remove a participant as an Invitee, it will also remove them as an Attendee, as you're effectively 'un-inviting' them from the Session.
12. Set your session attendee limit. If you have this turned off, the session will inherit the limit of the session location. This is a global limit, regardless of data type or group.

13. Select if you would like to display a session countdown. For a standard session type this is on by default (this is shown on web only). If you had a sponsor for the session, this would be an excellent opportunity to offer additional branding.

Click save changes.
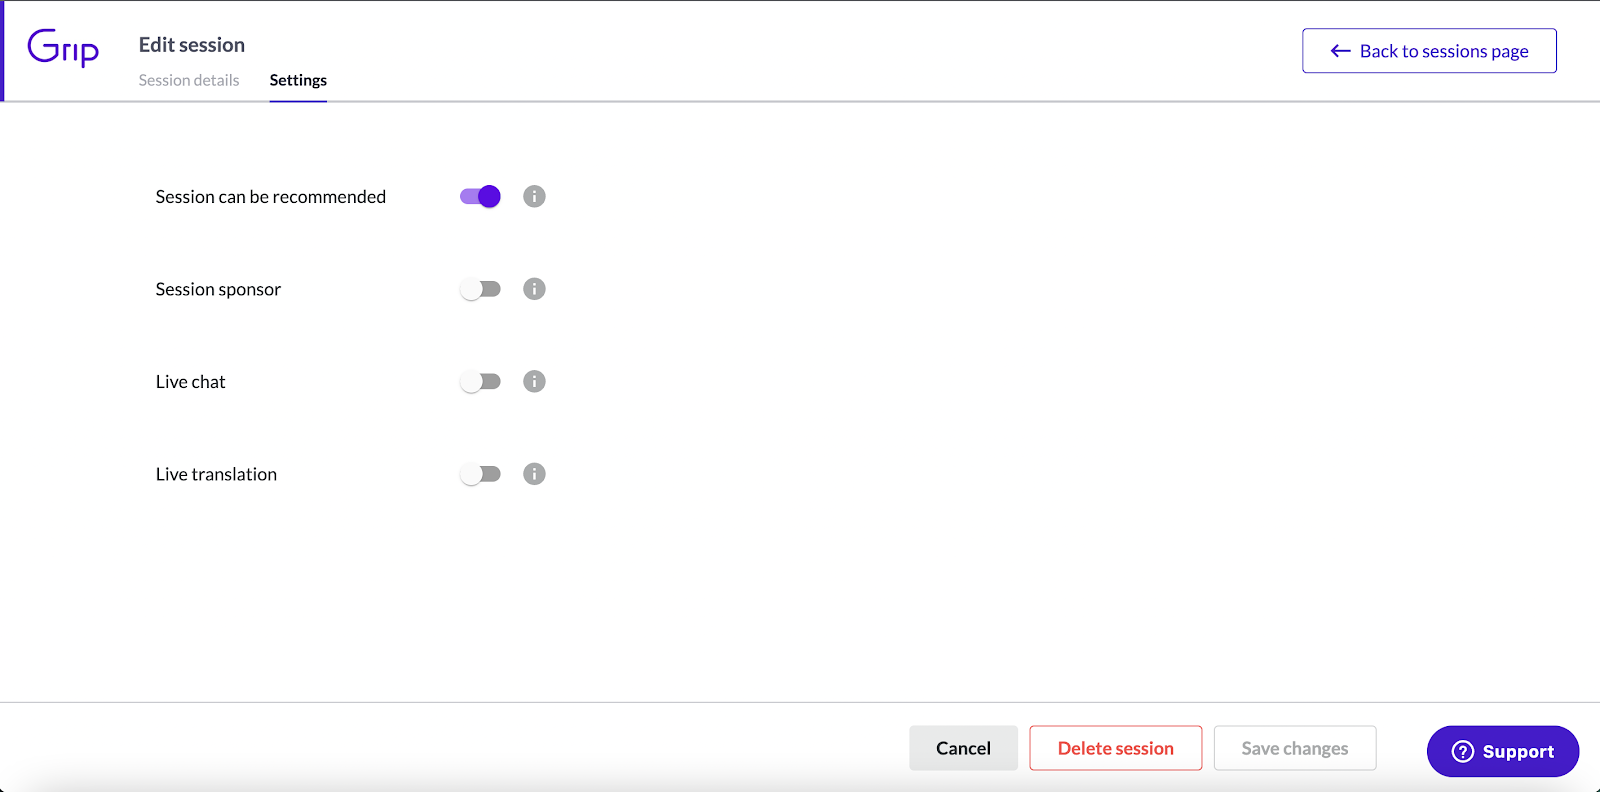
Settings
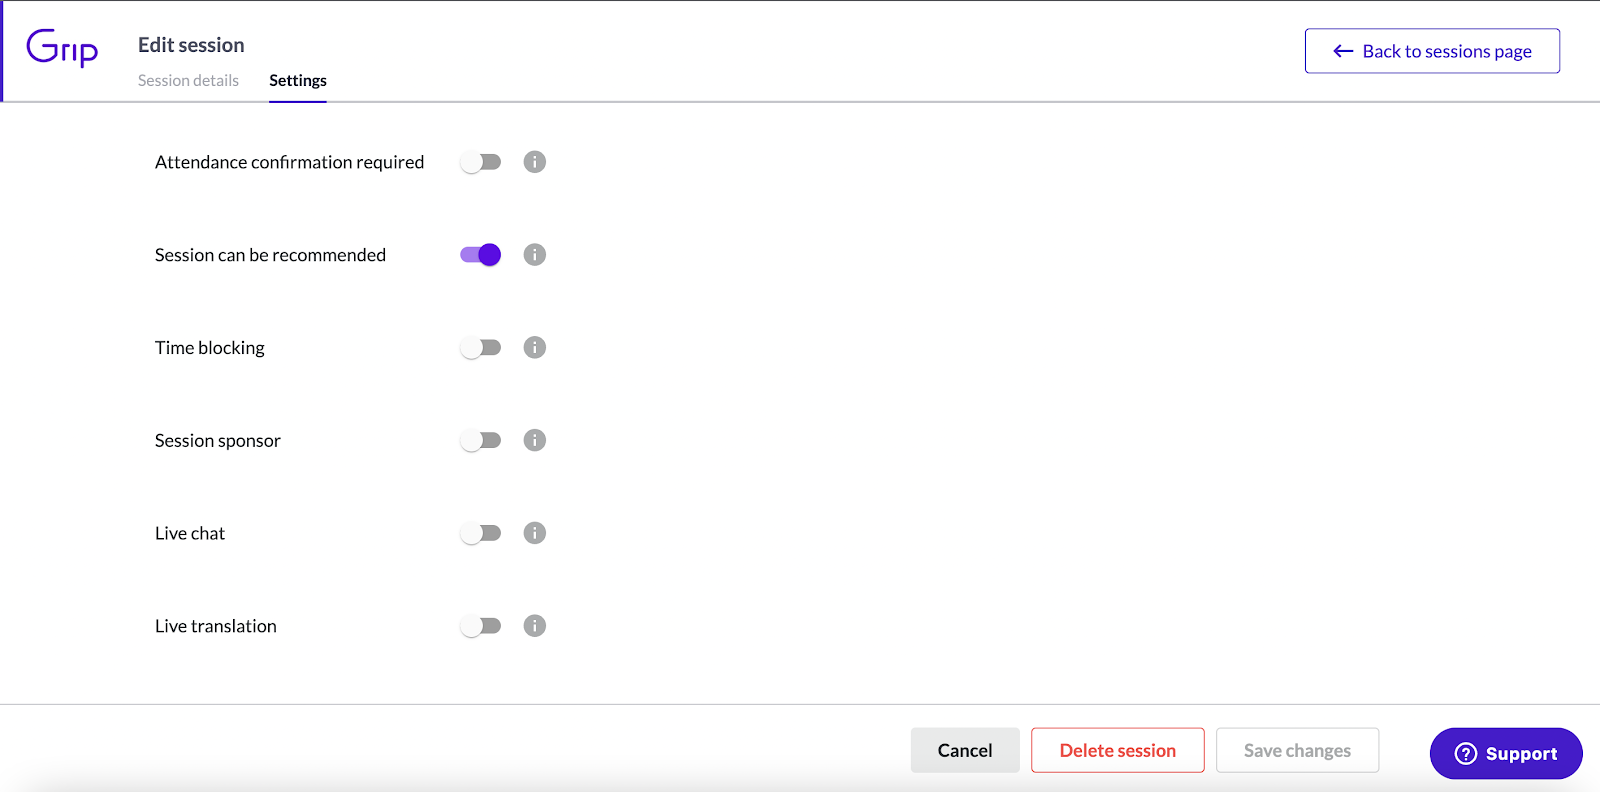
14. Head over to the 'Settings' tab for specific session details.

14a. Required attendance for all - The session will be configured to appear on the 'My Schedule' page for all event participants. However, they will not be automatically joined to the session and these sessions aren't time blocking. Other sessions can still be scheduled during this time block.
14b. Attendance confirmation required - Show an extra label with 'Mandatory Attendance' and a pop up to 'confirm attendance' when a user chooses 'Add to schedule'.
Note: While the 'Add to Schedule' button cannot be removed, you can bypass this step by setting "Show in all participant schedules." This option automatically adds the session to everyone's 'My Schedule' page, eliminating the need for individual users to manually add it.
14c. Session can be recommended - Session can be recommended to users in their schedules.
14d. Time blocking - Users will not be able to join any other sessions or meetings during this time. The clash warnings will be shown to warn and prompt the user to reschedule clashing items.
14e. Headline sponsor - Choose a company that will be promoted on the session page, along with receiving any session attendees as inbound Leads.
Important: To ensure that all leads are captured effectively, please encourage your headline sponsor company representatives to activate their Team on the web event platform as soon as possible.
14f. Open stream - Users will be able to watch the live stream and recording without having to add it to their schedule first. Some analytics that rely on session attendance will of course be lower as attendees don't have to take this step.
14g. Live chat - Select if you wish to enable live chat for this session.
15g. Live translation - Select if you wish to enable live translation for this session
16g. Session Attendee list - Toggle this ON to show Session Attendee List on Session Details page for this Session. Note that Session Attendee List is disabled when Sessions have "Required attendance" set to ON.
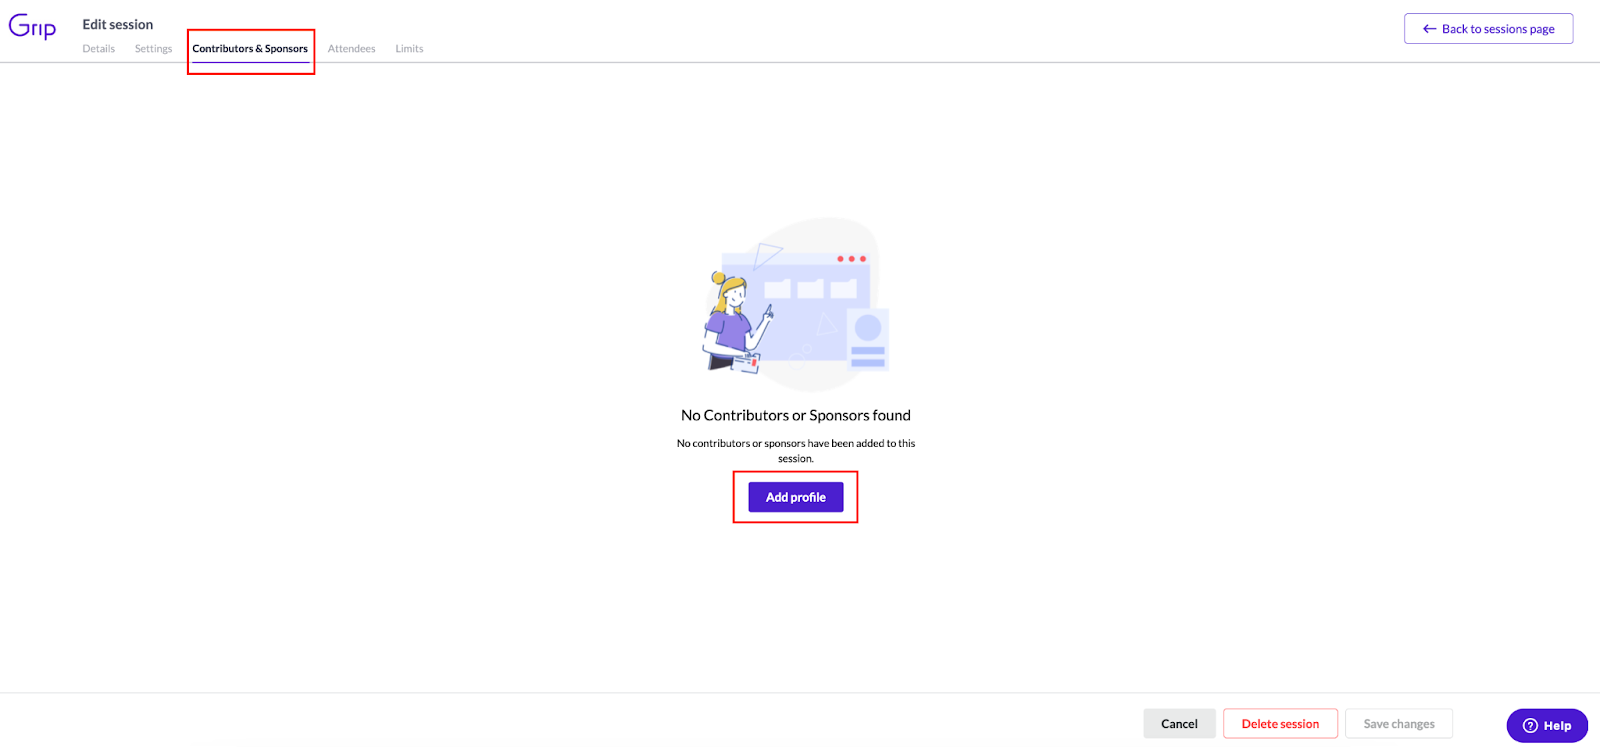
Session contributors
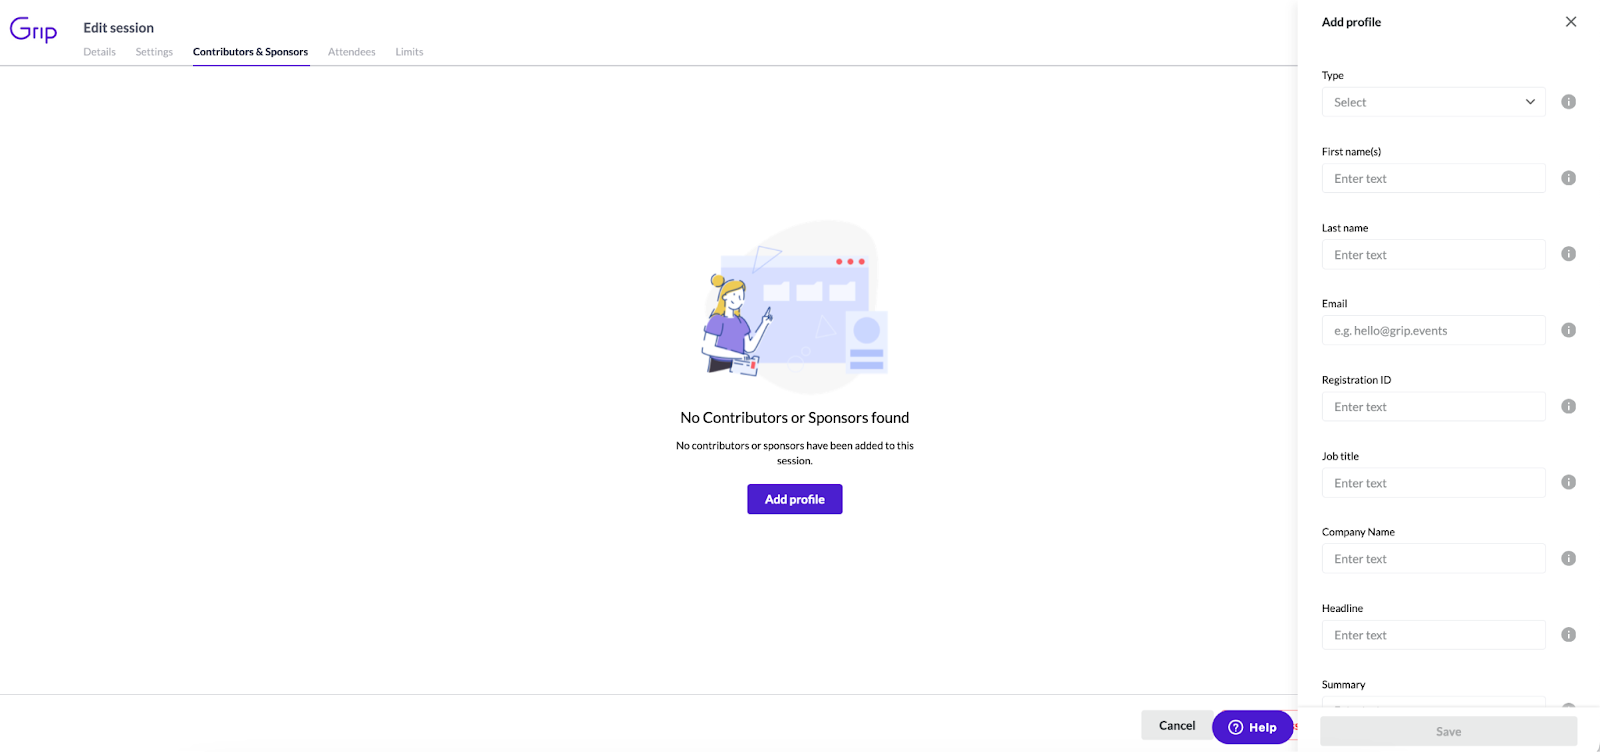
15. Head over to the Contributors & Sponsors tab. On this page click 'Add profile'
15a. A new sidebar will appear where you can either: search for an existing profile within the event and assign them a session role or you can create a new contributor profile if the person you're adding is not already in the event data.
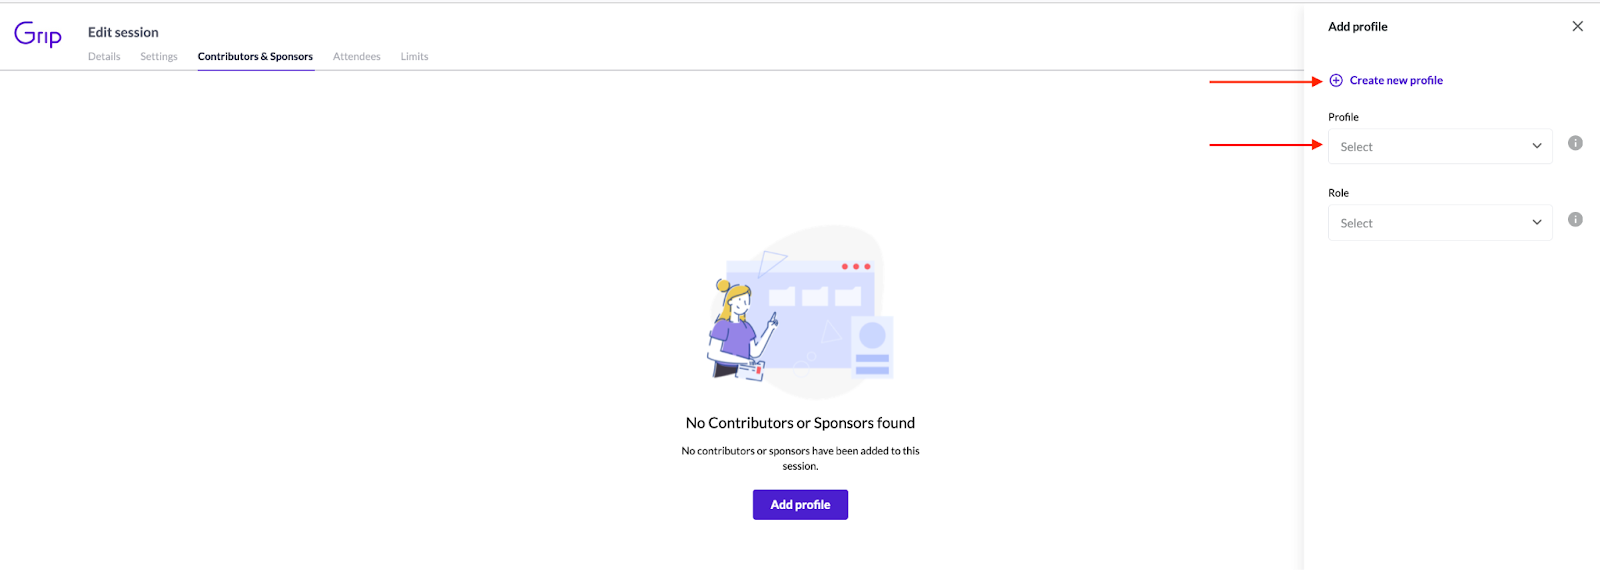
15b. If you create a new contributor, a new side bar will open up, where you can fill in the person's details. Make sure to scroll down that box so that you can complete all the fields.
Once you’ve chosen or created a new profile you can assign a role to it
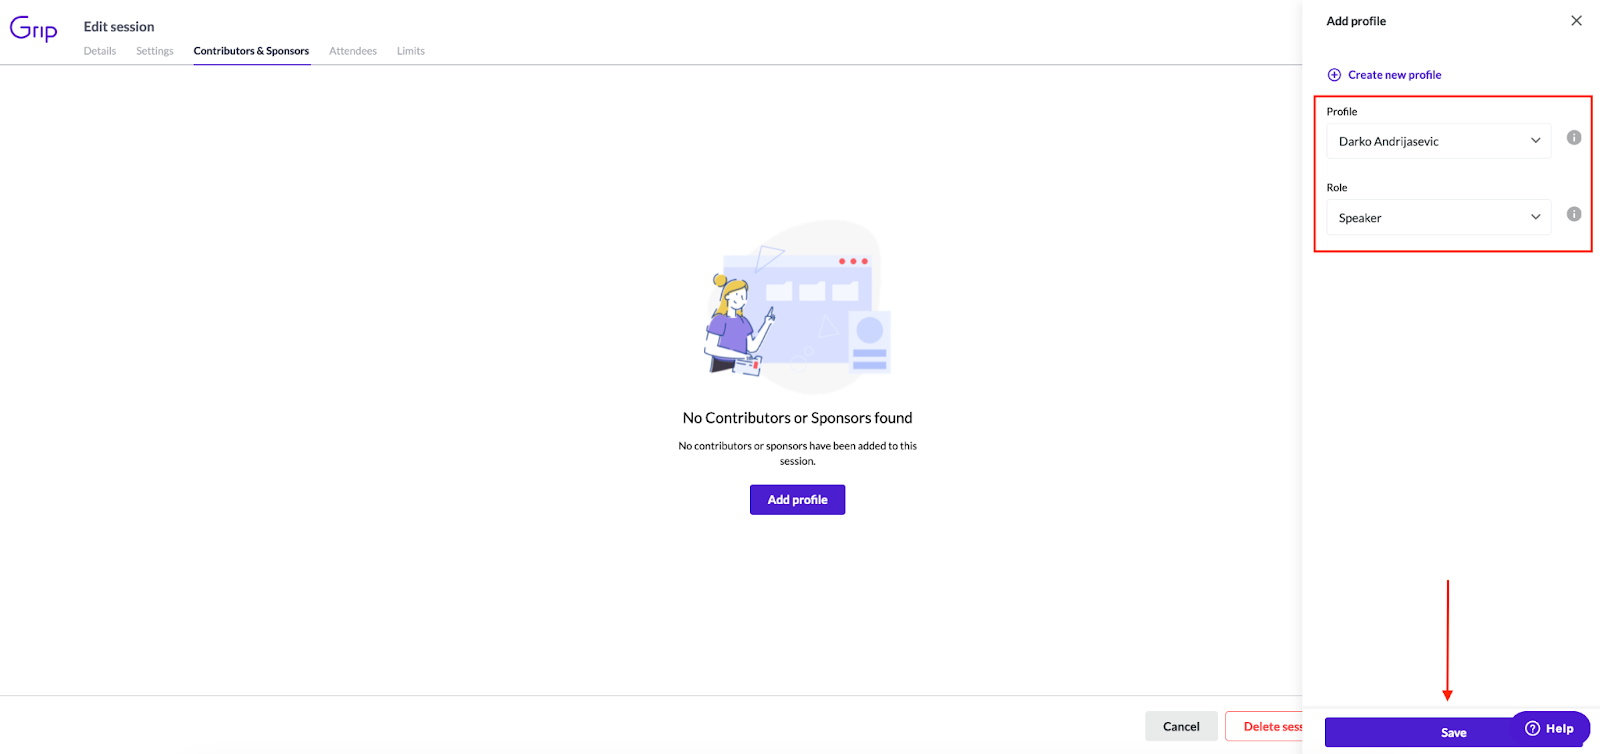
Click “Save”, and the profile will appear in the table with its role assigned.
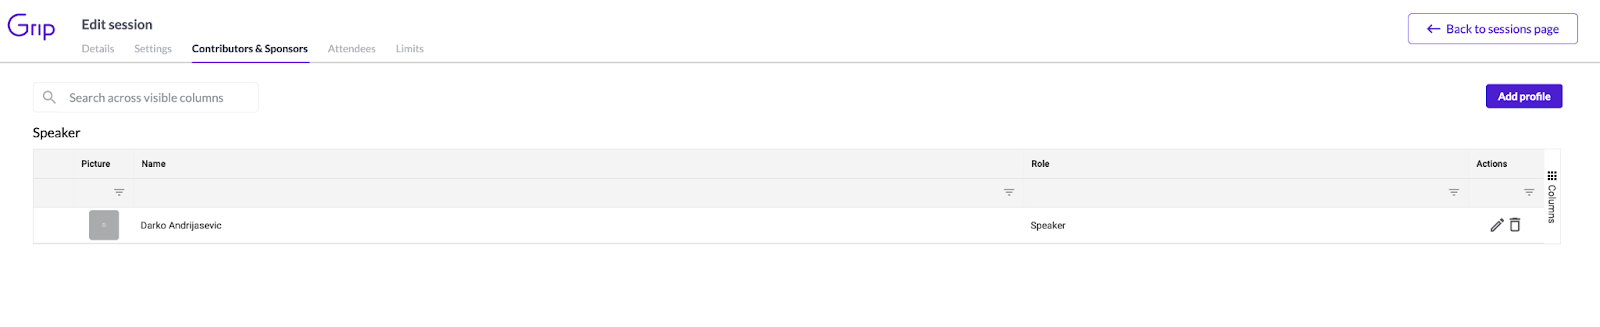
15c. If you want to edit the role of a session contributor, click on the pencil (edit) icon on the far right of their name.
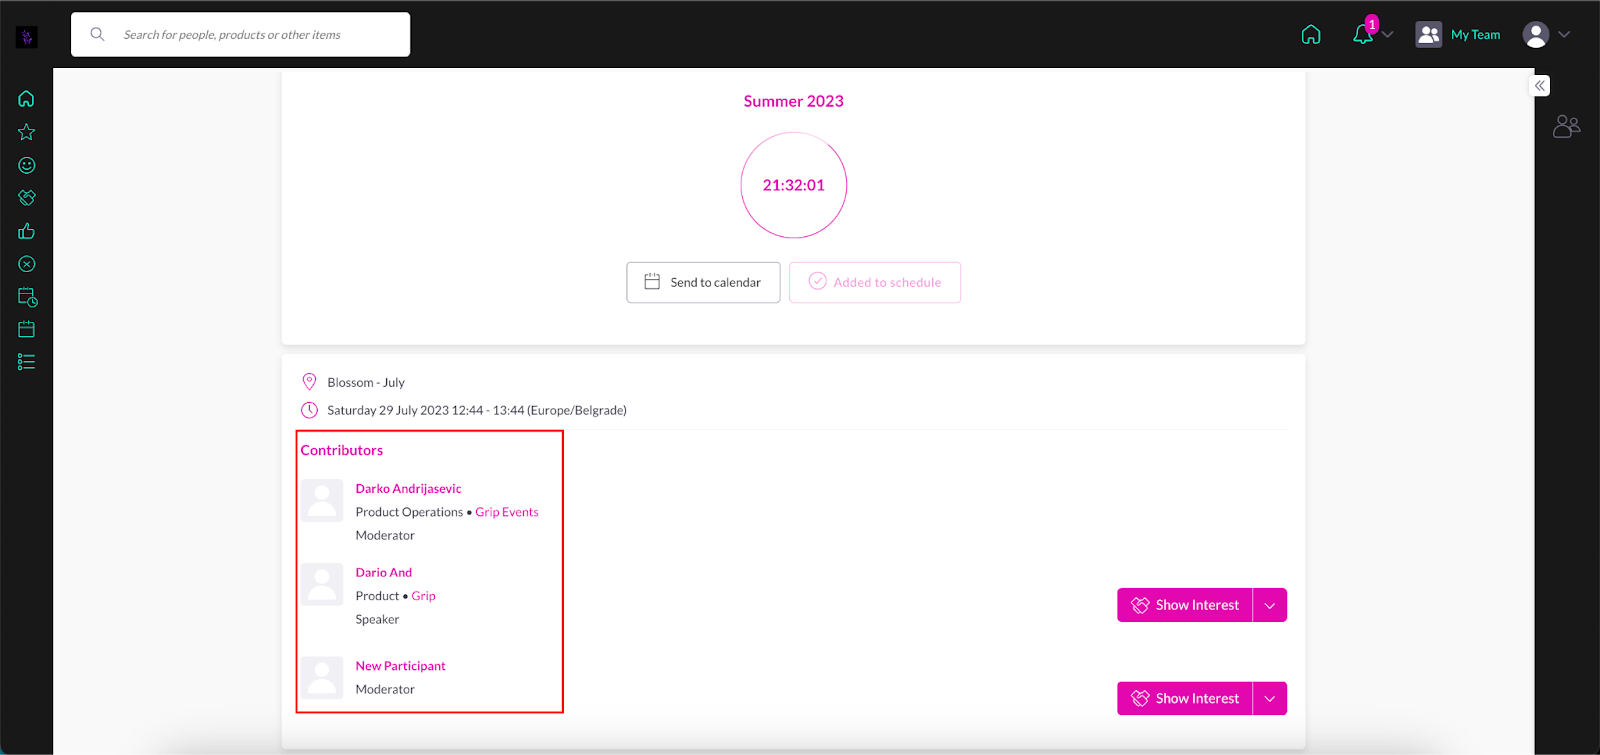
16. Note that you can change the order of the contributors by dragging and dropping them in the table. This feature is fully customizable, allowing you to arrange them in any way you prefer for each session.
The order that you set for the profiles and roles will be reflected in both web and mobile apps on:
- Event Agenda screen
- Session Details screen

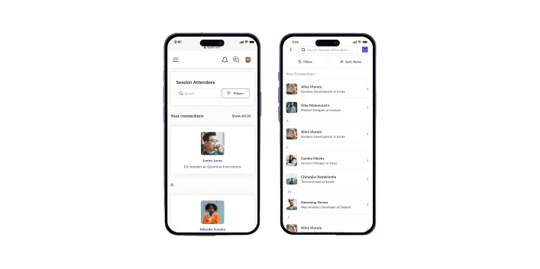
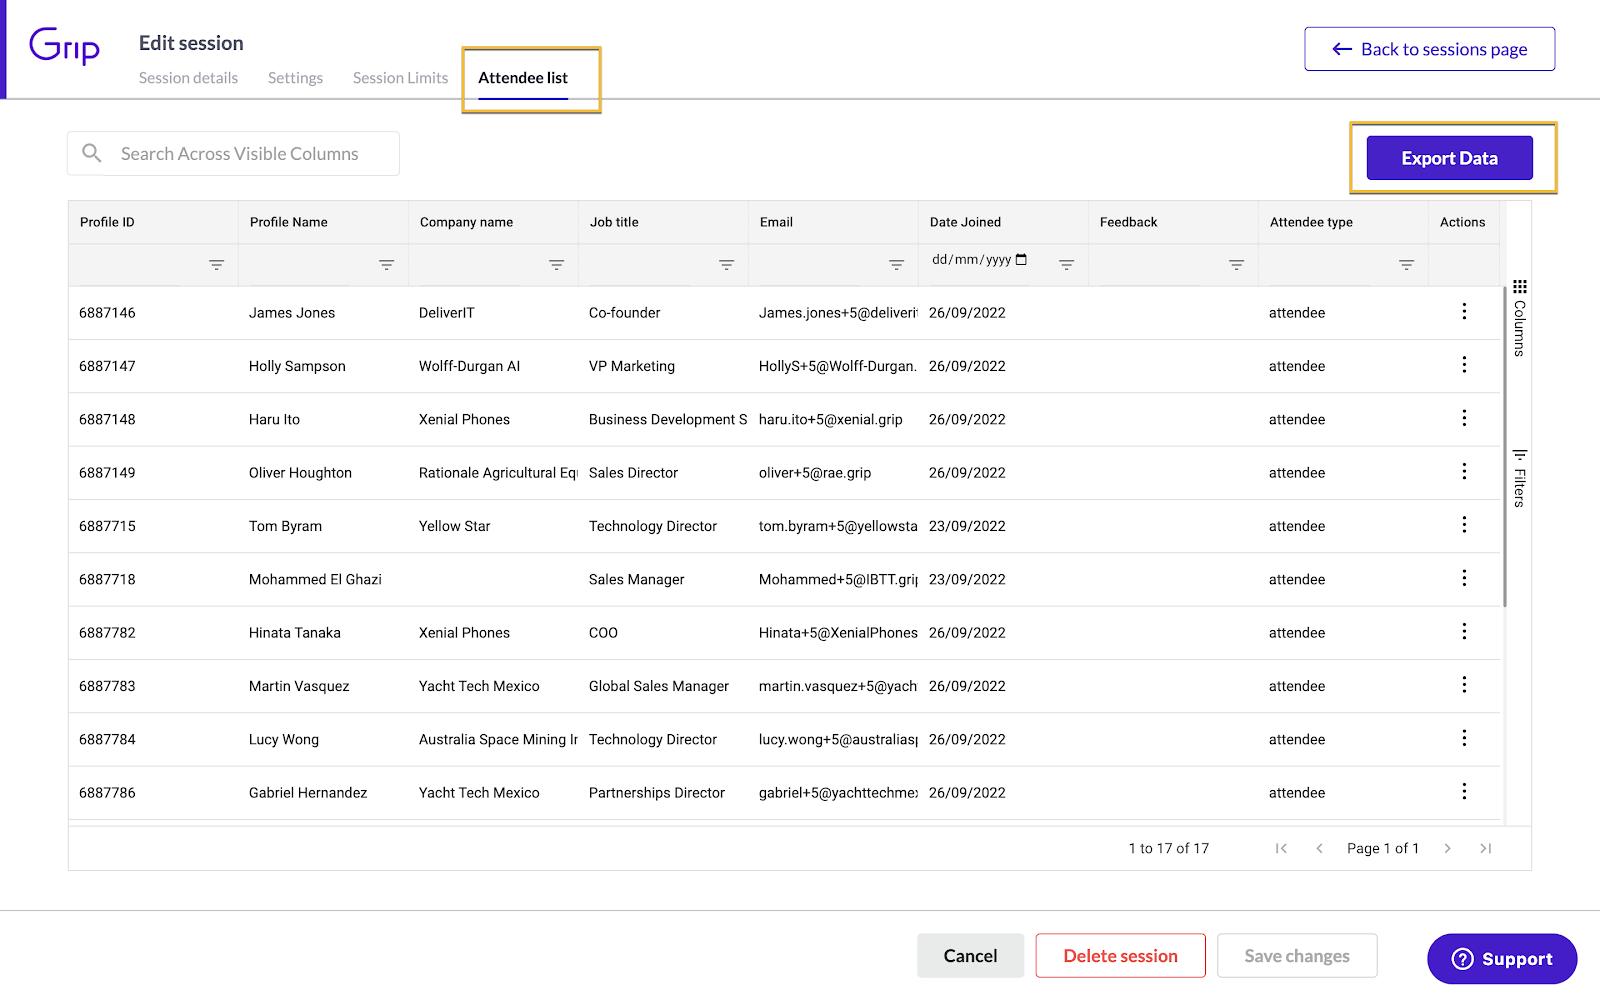
Attendees
The Attendee List will show all attendees who have added this session to their schedule. From here, you are able to export this list. Note that Private sessions have 'invitees' (people that can see the session in the agenda) which is separate to this attendee list (people who have added this session to their schedule).
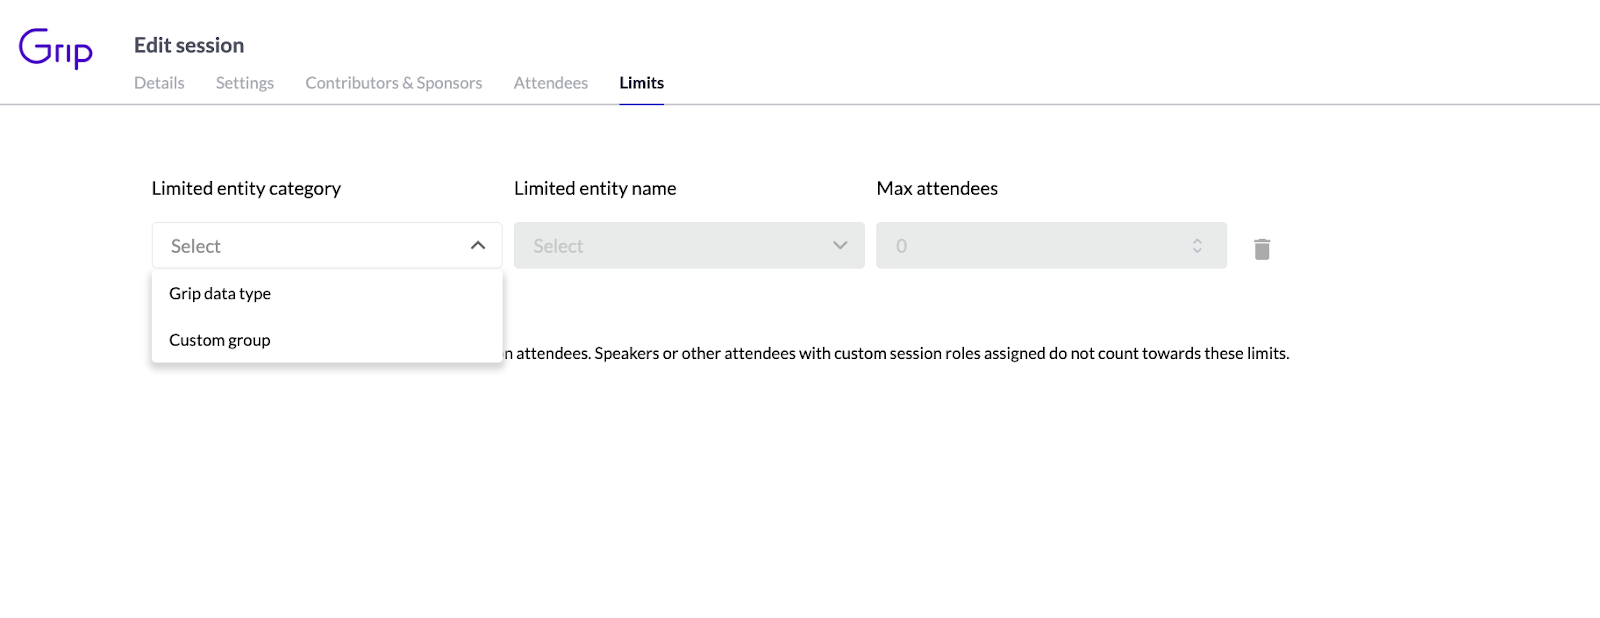
Limits
You can set limits to the number of participants that can add a session to their personal schedules. You might use this when you have limited seats in a conference room. You can limit attendees by a data type, or a custom group.
16. Click save changes.
Webinars
Webinars are designed to be one-way broadcasts by invited speakers, with attendees being able to ask questions within the chat or designated q&a tool, but not actively participating in the presentation. Creating a webinar is similar to creating a standard session as shown in the section above.
1. In the 'Event Settings' tab click 'Event Agenda'. At the top right you will see a button named 'Create Session'.

2. Enter your session name and select 'Virtual Webinar' in the 'Format' section.
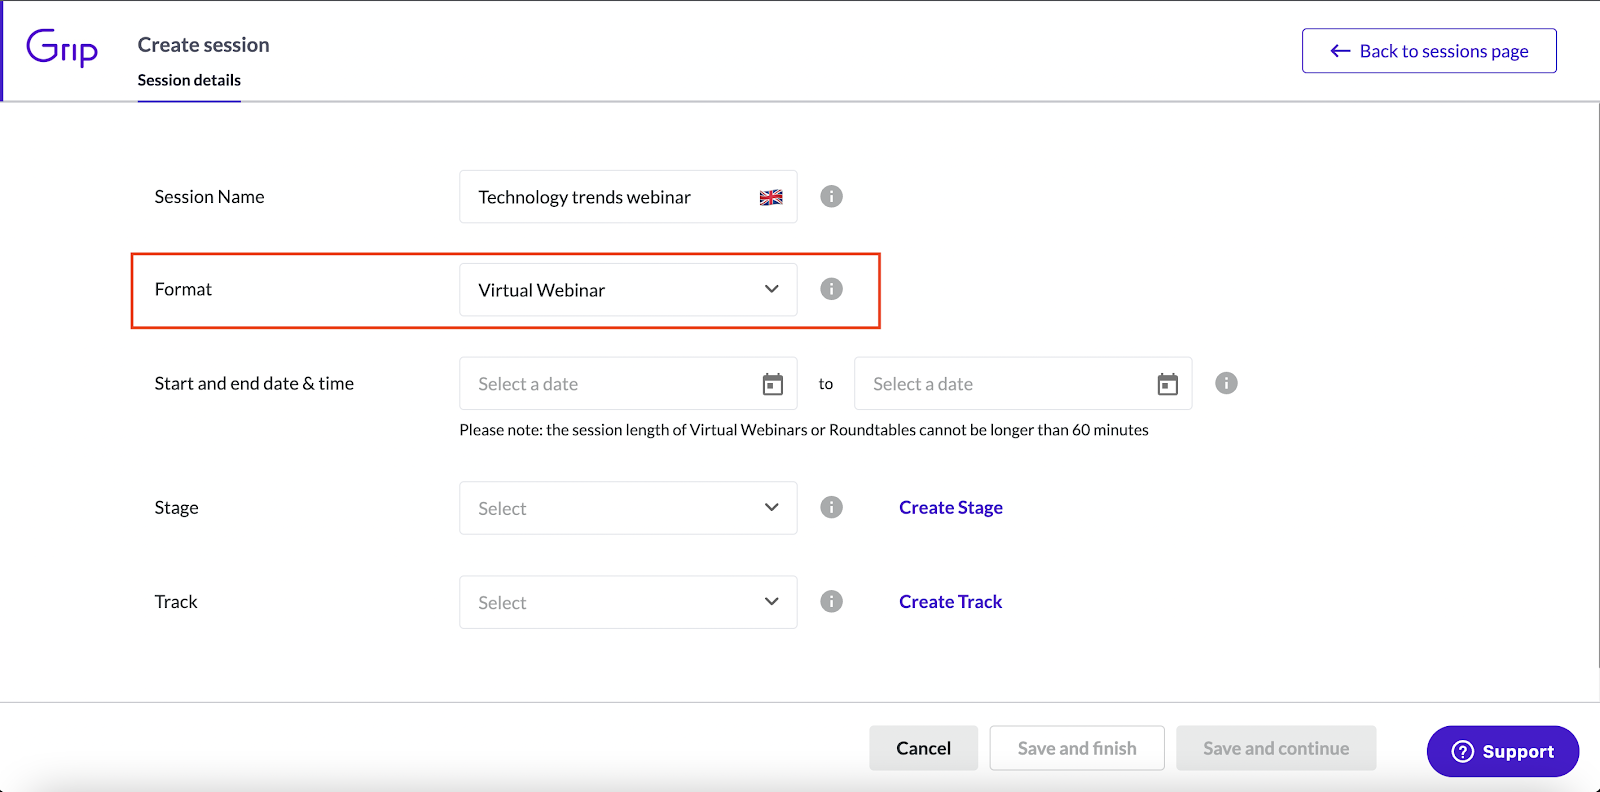
3. Fill out the session details as you would with a 'Standard session' in the section above. Please note, a webinar cannot be longer than 60 minutes. Click 'Save and continue' to continue or 'Save and finish' to save the session details and continue later.
4. Fill out the 'Session details' page as you would with a 'Standard session' shown in the section above. Please note, in order for a speaker to get the speaker view you must add them as a 'speaker' in the Grip Engage Admin.

5. Click 'Settings' at the top left and choose your settings requirements. The only button missing from the webinar settings section is 'required attendance for all', everything else is the same and explained in the standard session section above.
Click 'Save changes'.
Roundtables
Roundtables are discussions where all attendees can play an active part with open peer-to-peer communication and information exchange. Please note - only 25 participants can actively share their audio and video at the same time in a Grip Roundtable (though more can be present and swap in/out of video). Creating a Roundtable is similar to creating a standard session, and webinar as shown in the sections above. Speakers within a roundtable will be moderators, meaning they will be able to remove people from the session and delete chat. Speakers must be added as a 'speaker' within the Grip Engage Admin to get the speaker and moderator view.
1. Fill out the 'Session details page' as shown in the sections above. in the 'Format' dropdown, select 'Virtual Roundtable'. Click 'Save and finish' or 'Save and continue'.
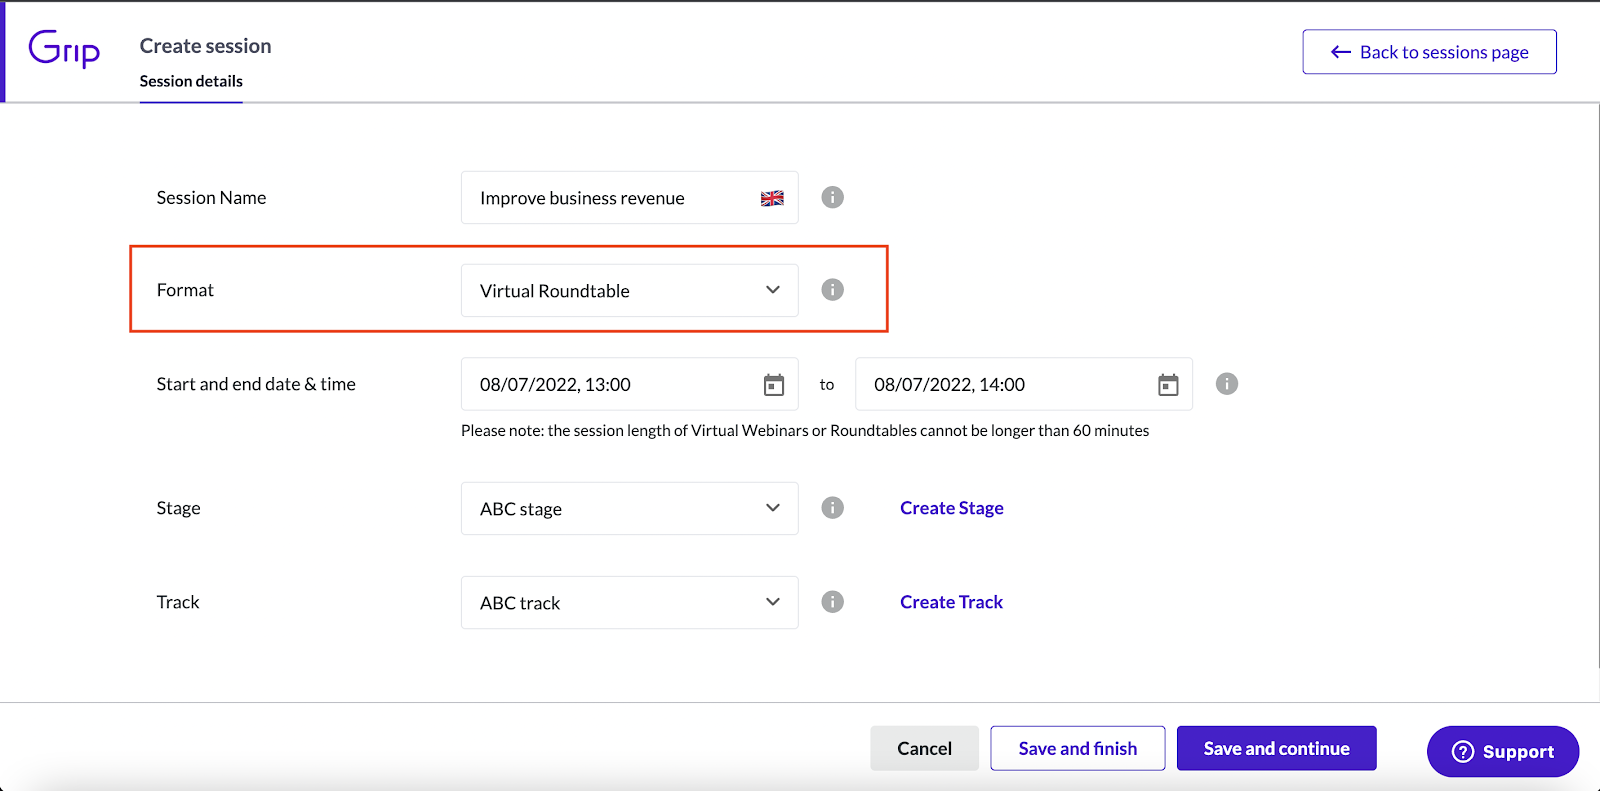
2. The Roundtable session details page is the same as webinars and standard sessions as shown in the sections above. The only difference is 'Session Countdown' which cannot be disabled.

3. Fill out the 'Settings' page as shown in the sections above. The only toggle missing for a Roundtable is 'Open stream'.
Click 'Save changes'.
Speed networking sessions
1. In the 'Create a session' page, fill out the session details as shown in the sections above. in the 'Format' dropdown select 'Speed Networking'.
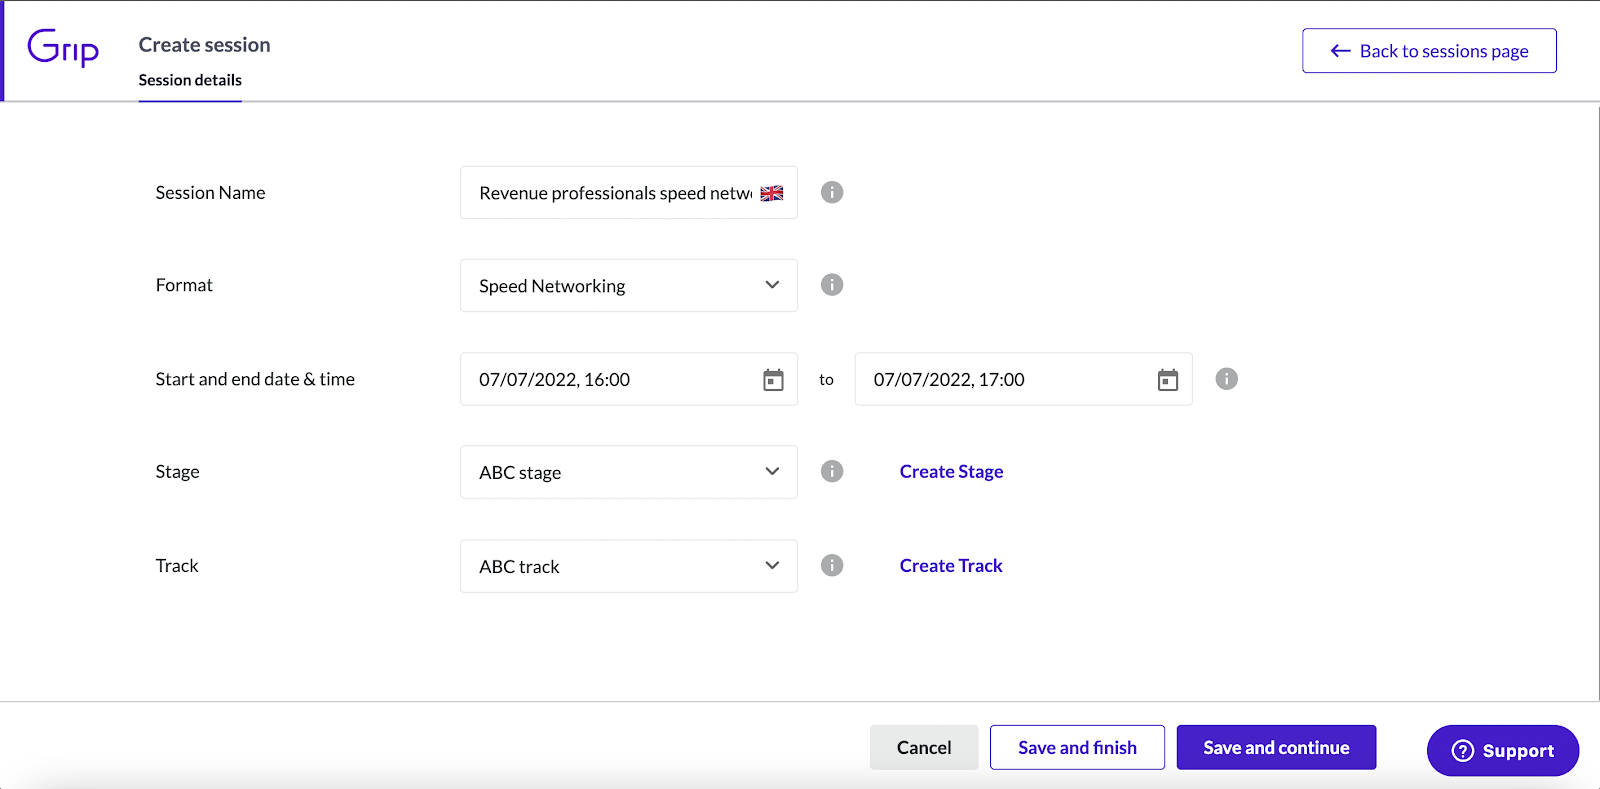
Click 'Save and finish' or 'Save and continue'.
2. The Speed Networking session details page is the similar to webinars, roundtables and standard sessions as shown in the sections above. Like roundtables, the 'Session Countdown' cannot be disabled. The one difference is 'Meeting Generation Settings'. Select whether you would like to restrict meetings based on data type (participant type) settings. You can limit which types get to be matched, or no restrictions.
3. Click 'Settings' at the top left and choose your settings requirements. You have less options here, these are in explained in the sections above.
Click 'Save changes'.
Editing a session
1. In the 'Event Agenda page' you will see all of the sessions you have created. To edit a session, search for your session using the search bar or simply scroll through the table and find the session you want to edit. Click on that session to open details.

2. If you would like to make changes in bulk, tick the boxes of the sessions you want to edit, click on the 'Actions' button and then click ‘Edit sessions’.
This will open a side panel with the options to make the following changes to all sessions selected:
- Override ‘Location’
- Override ‘Track’
- Add ‘Headline sponsor’
- Enable/Disable ‘Private session’
- Enable/Disable ‘Session countdown’
- Enable/Disable ‘Session can be recommended’
- Enable/Disable ‘Attendance confirmation required'
- Add ‘Tags’
- Enable/Disable ‘Time blocking’
- Add, replace or remove 'Custom field data' (pre-defined fields only)
- To remove custom field data, choose a field, then leave the value box empty and ensure the 'replace' option is enabled.
FAQs
Q: Can presentation slides be downloaded from sessions?
- A: Yes, presentation slides can be downloaded from the web networking platform and iOS devices. However, this feature is not available on Android devices due to platform differences at the OS level.
Q: How can I watch a recording of a session?
- A: You can watch the recording of a session only if you previously added that session to your schedule. If not, the "Watch Recording" button will not appear. Please note, this restriction applies only to the web networking platform; on mobile, the "Watch Recording" button is available regardless of whether the session was added to your schedule.
Q: Can I have more than one Main Stage?
- A: No, only one Main Stage is allowed per event.
Q: Can the session countdown be turned off for Main Stage sessions?
- A: No, the countdown is always enabled for Main Stage sessions and cannot be turned off.
Q: Can I promote multiple locations to the homepage?
- A: No, only one location can be promoted to the homepage per event.
Q: Is there a limit to the number of webinar viewers?
- A: No, there is no limit to the number of viewers in a webinar.
Q: Is there a limit to the number of participants in a roundtable?
- A: Yes, up to 100 participants can join, but only 25 can share audio and video simultaneously. We recommend limiting roundtables to 25 participants.
Q: Are roundtables recorded via the Grip platform?
- A: No, roundtables are not recorded.
Q: Are webinars recorded via the Grip platform?
- A: Yes, webinars are recorded. Full features like transcripts and translations require a premium package.
Q: Do speakers need separate access to webinars or roundtables?
- A: No, speakers access the webinar or roundtable like attendees, but they will automatically have a 'speaker view' upon joining.
Q: Is there a time limit for Grip Streaming sessions?
- A: Yes, Grip Streaming sessions have a one-hour time limit.
Q: What happens if a Grip Streaming session exceeds one hour?
- A: There is a 30-minute grace period before the session is cut off.
Q: Who can share their screen during a Grip Streaming webinar?
- A: Only speakers can share their screens.
Q: Can you change your video background during sessions?
- A: No, background customization is not available.
Q: What is the difference between speaker and attendee views in webinars?
- A: The views are mostly the same. The key difference is that speakers have access to mute, share screen, and video toggle buttons, while attendees do not.
Q: Can I set a limit on attendees for Speed Networking sessions?
- A: No, Speed Networking sessions do not allow attendee limits as participants can join without scheduling in advance.
Q: How many users can participate in Speed Networking at the same time?
- A: Up to 1,000 users can be in the waiting room simultaneously. Once this limit is reached, new users will be prompted to try joining again or leave the session.
Q: How long do Speed Networking meetings last?
- A: Each meeting lasts 3 minutes. During the meeting, participants can show interest in each other. If both show interest, a connection is made. After the session, participants will receive a summary of their meeting partners.
Q: Is there a limit on the length of Speed Networking sessions?
- A: No, Speed Networking sessions do not have a time limit.
Q: What are the rules for meeting generation in Speed Networking?
- A: Meetings are randomly generated between participants, with two exceptions:
-
- Meetings are not generated between members of the same team.
- Meetings are not generated between users who have already met during the current Speed Networking session.
Q: Are Speed Networking sessions time-blocking?
- A: No, Speed Networking sessions are not time-blocking.
Q: Can speakers see who is attending their sessions?
A: No, speakers don't have automatic access to the attendee (event participant) list for their sessions. This information is only available on the Grip Engage Admin, which is accessible to event organizers.
Q: I created a QR code for the agenda link, but when I click it on my phone, it opens in a web browser instead of the app. How can I access the agenda in the app?
A: Currently, there isn’t a link that takes you directly to the agenda in the mobile app. The mobile app doesn’t support links to specific sections like the web platform does. The best option is to use the smart marketing link (available under event details on the Grip Engage Admin). This link will direct users to the mobile app if they are on a phone, or to the web version if they are on a laptop.
Q: Is there a link that can open features in the mobile app, like the event agenda?
A: No, the only link that can take you directly to the mobile app is the smart marketing link (found under event details on the Grip Engage Admin). This link will automatically open the correct platform: the web version on a laptop and the mobile app on a phone.
Q: Can I reorder locations and tracks in the Event Agenda?
A: Yes! You can now manually reorder both locations and tracks using drag-and-drop in the respective admin portal tables. The custom order will be reflected in the filters on both web and mobile. This update is helpful for highlighting commonly used or high-priority categories.
Q: Will changing the order of Locations or Tracks affect the order of sessions?
A: No. Sessions will still be sorted chronologically or by search relevancy. Reordering only changes how locations and tracks appear in filter menus.