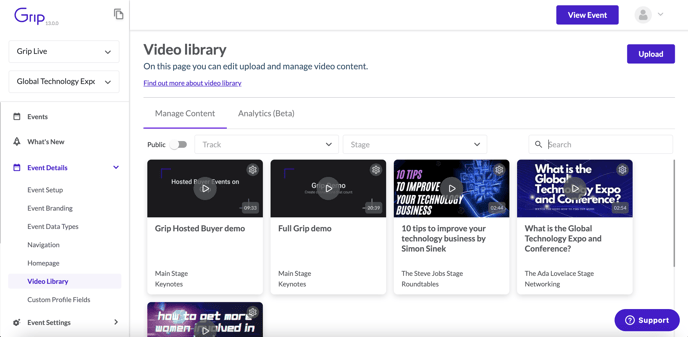
The Video Content Library can be used to store and upload video content from your event. Sessions will display in the Video Content Library, you can also upload videos that are not your event sessions via a URL or file upload. You will be able to manage all of your video content from here.
In this article, we will cover:
- Background info - CLIPr
- How to set up a Video Content Library
- How to edit video content
- How to display the Video Content Library in your event
- How to make video groups
- How to add video tags
- How to add a video carousel block on the home feed
- FAQs
Background info - CLIPr
We host videos using CLIPr. CLIPr is able to:
- Transcribe audio
- Navigate through the video with an automatically generate indexed menu
- Users can bookmark their favourite content
- React with comments and Emojis
How to setup a Video Content Library
1. In the left-hand navigational bar under Event Settings, you will see “Video Library”. If you have not yet purchased the Video Content Library then you will see a holding page.

2. Once you have purchased the Video Content Library you will have instant access to start uploading all your content.
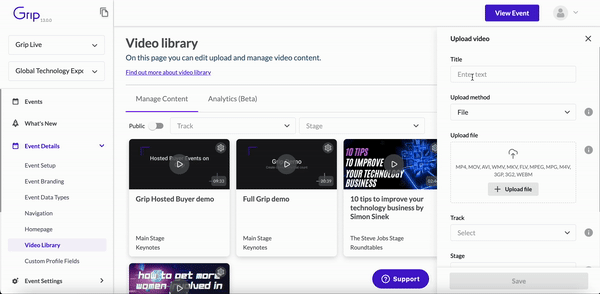
3. When you click 'Upload' you can upload via file or URL (Please make sure you have relevant permission to use the content).
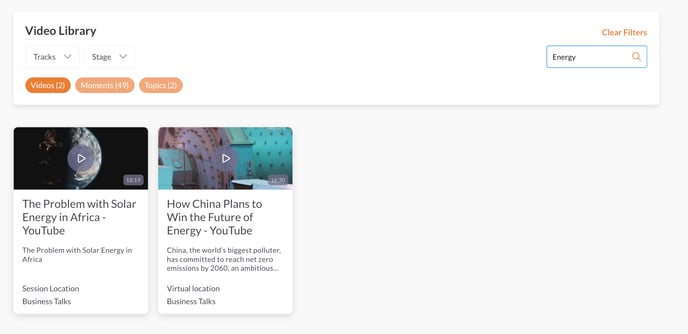
4. You can filter and search for your videos by track, stage, or using the search functionality.
How to edit video content
Logged into the dashboard you will have additional functionality that allows for the editing of the video’s metadata as well as the video itself to make sure that words have been transcribed correctly.
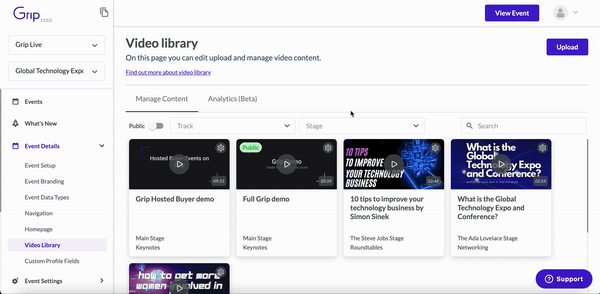
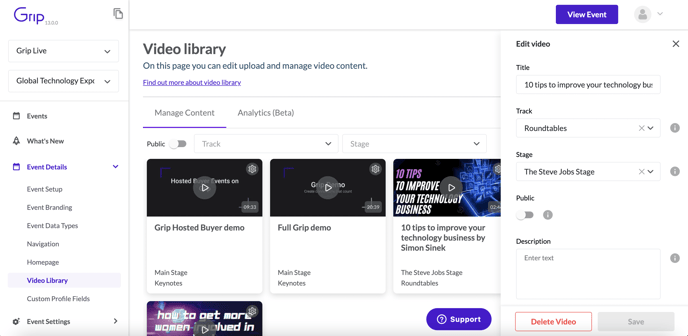
1. Click on the settings cog icon on the top right hand corner of each clip. You can edit the video information here, including the title, track, stage, and description. You can also set the video as public. When videos are set to the public the video will also be viewable in the Grip iframe, which does not require the user to log into the event.
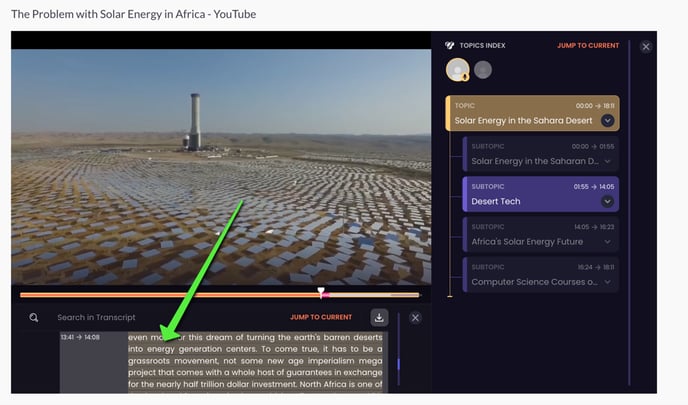
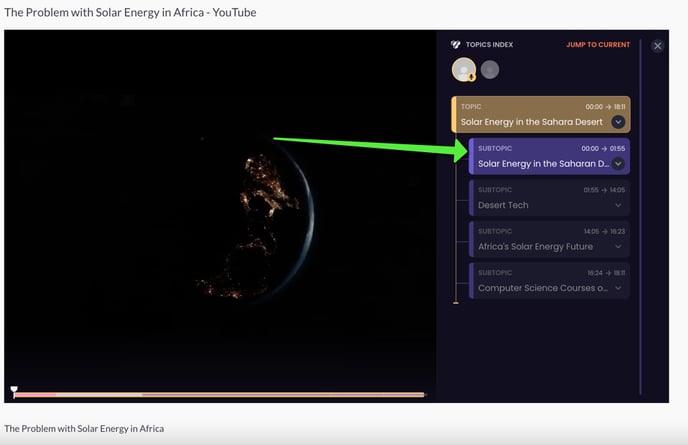
2. You can edit the video by clicking on the play button. The topic index will appear, if you click on a 'Topic' or 'subtopic' you will have the option to edit the topic/subtopic.
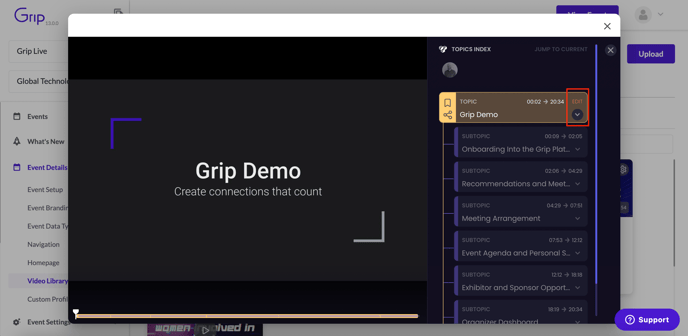
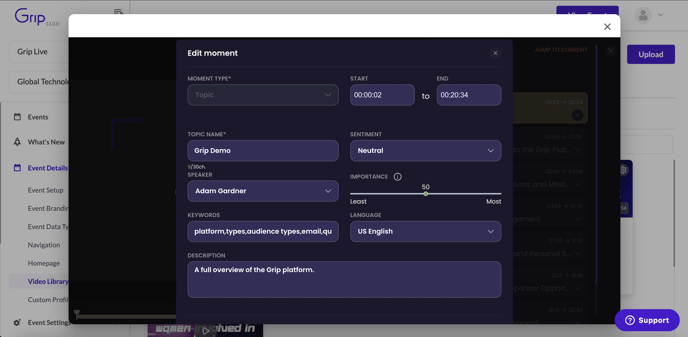
3. When you have clicked 'edit' you will have the option to edit the moment type, topic name' speaker, keywords, description, start and end time, sentiment, importance, language, and delete topic.
How to display the Video Content Library in your event
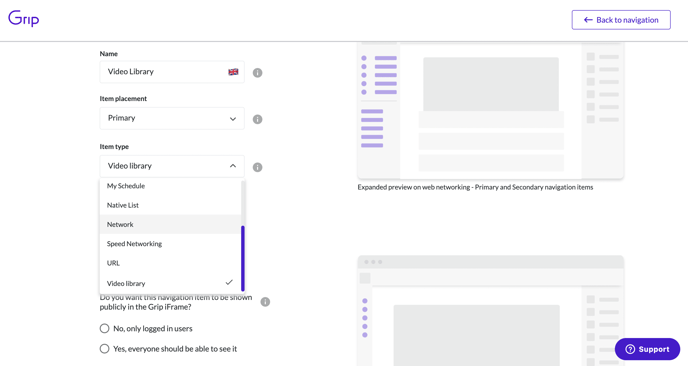
1. Create a Video Content Library navigational item. Navigation → Create new → Item type → Video Library. Fill in all the relevant information, and select how you want the video content to be displayed. You can choose either to display the content in a list or grid view. The Video Content Library Navigation Item can be made without users needing to login using the Grip iframe.
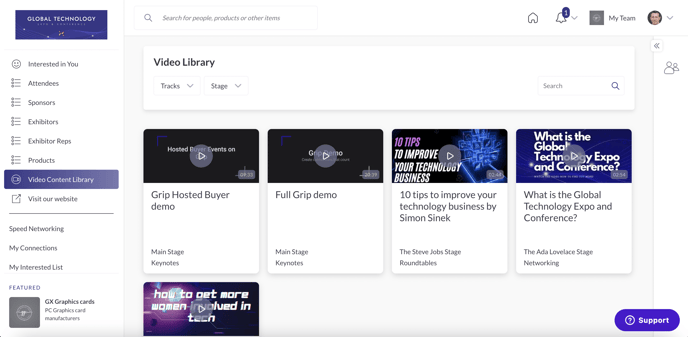
2. Once you have created your Video Content Library navigation item, it will show in your event like the below example.
How to search moments and topics
With intelligent categorisation and the ability to search for specific Moments and Topics, you can quickly and easily filter and access the content you're looking for. Plus, when you select a Moment or Topic from your search results, the associated video will automatically start playing at that exact moment. Give it a try today and see how it can revolutionise your experience with your video library!
When a participant uses the search functionality, they will be shown three pills underneath the filters. These categories are:
- Videos
- Moments
- Topics
Videos
The results for videos will show the results based on the title of the video. In the example below you can see that Energy is in the video titles.
Moments:
Moments consist of three categories based on key words in your search term:
- Transcript:
- This searches keys words based on all the transcripts in all the videos in the video library.
An example below. Searching for Energy, I have a result in my moments tab: “energy”. A result again Transcript, with an example of the transcript with the highlighted keyword. When clicked the user will be taken to the exact moment in time where transcript started.
Sub Topics:
Sub Topics works in the same way and would look for key words based on users search and search through all the titles of the sub topics against all the videos in the library.
Paragraphs: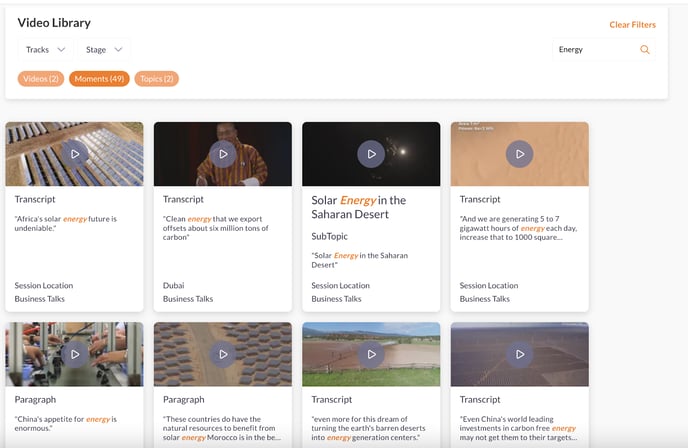
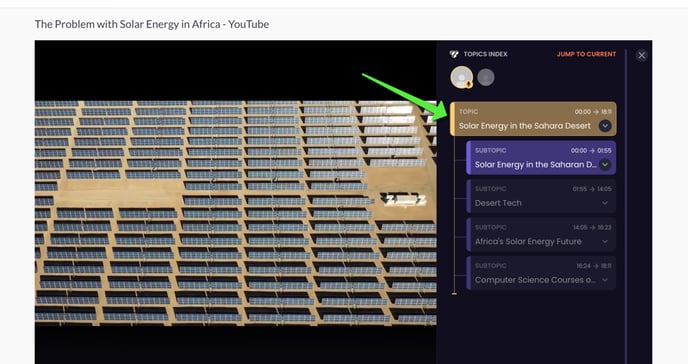
Topics:
Searches in the Topics section are key words from your searches that are based on the title of a Topic. This allows a user to start watching content on a specific topic half way through the a video without the need to scroll through and find it.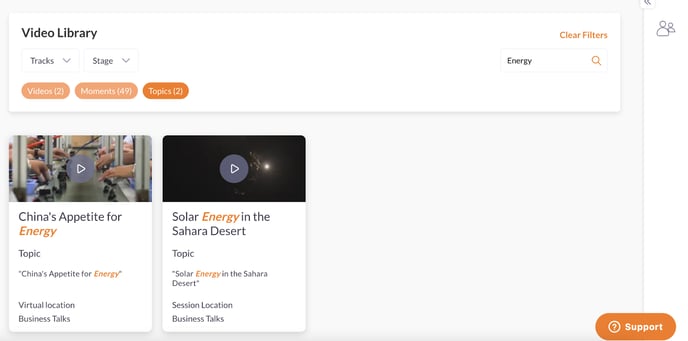
Video Groups
Grip has introduced a new feature for event organisers - the creation and management of groups. With this feature, organisers can now categorise their videos into groups within their video library. The benefit of this is that organisers have more flexibility in how they display their content for attendees.
In addition to organising videos, groups can also be utilised when setting up the navigation for the video library. This means that event organisers have complete control over the arrangement of each view in the library. There's also a "See All" option for each group, allowing organisers to view all videos within that group, much like a filter.
How to create video groups?
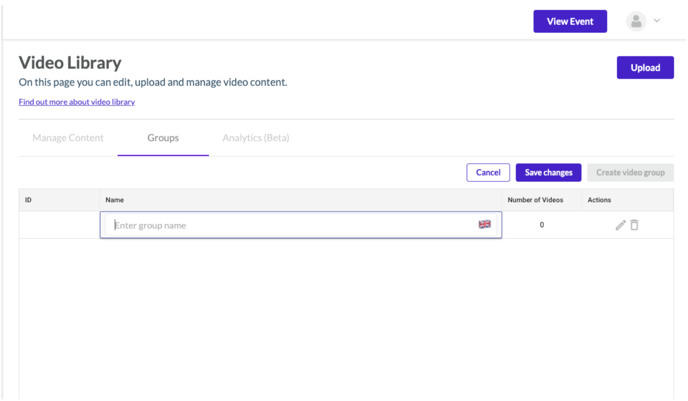
1. In your video library on the dashboard, click on the Groups tabs. You will see the option to create your first video group.

2. Next, you will be prompted to name your first group. Click on the flag to name your group in different languages. Once you have done this, click on save changes button on the top of the table.
3. You will be able to edit the name of your group by clicking on the pencil icon. To delete the Group, click on the bin icon. After the group is deleted, all the videos that have been assigned to that group will no longer have that group visible.
Assigning videos to groups
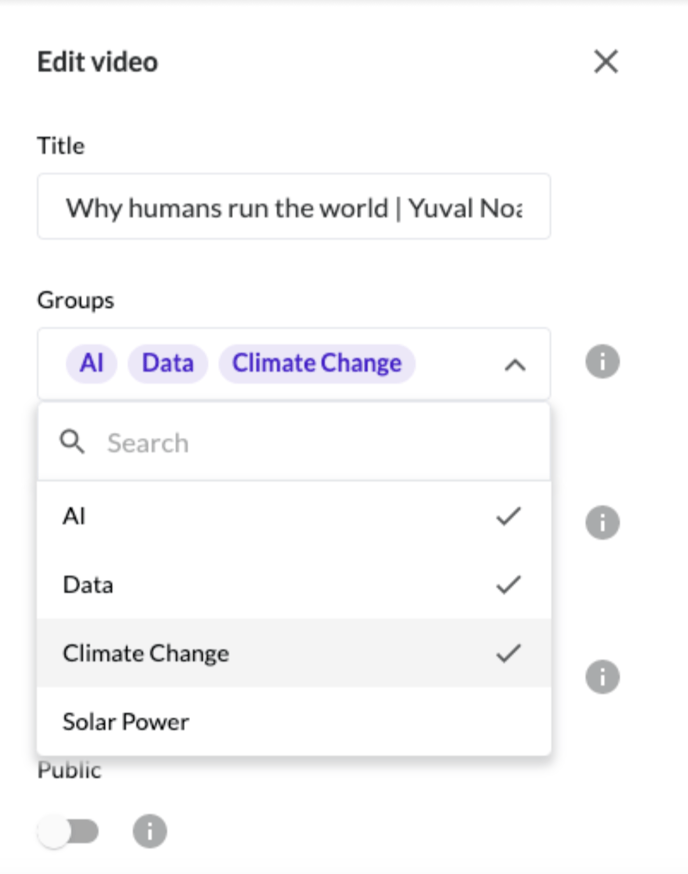
1. Assign videos to your Groups in the manage content tab. Find the video you want to add to a group, then click on the edit video settings cog on the top right of the video card.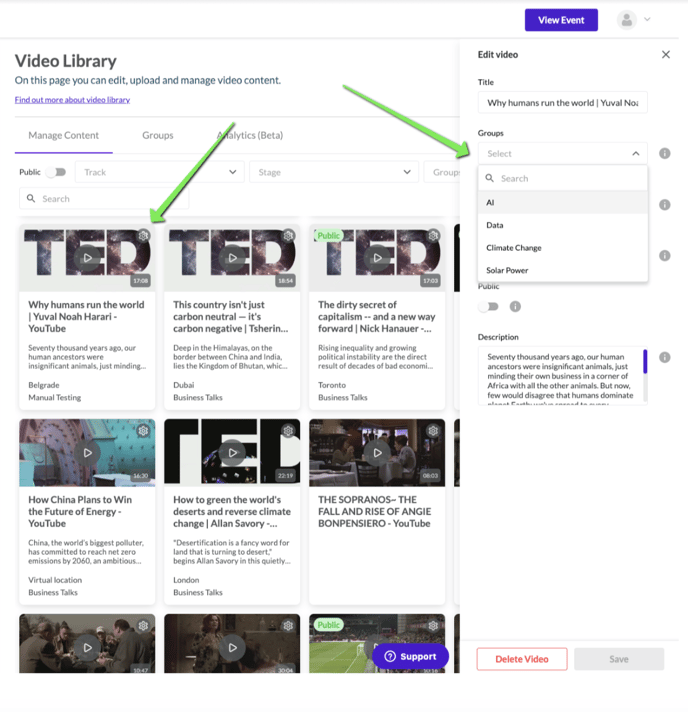
2. This will open the Edit video where you can select the groups you have created and assign them to the video. Note that you can assign more than one Group to a video.
Create a Navigation Item of the Video Library with Groups
1. On the dashboard, click on Navigation and then Create Navigation Item.
2. Start creating your new navigation item by adding the name that you want the navigation item to be called. Select the Item type as Video Library.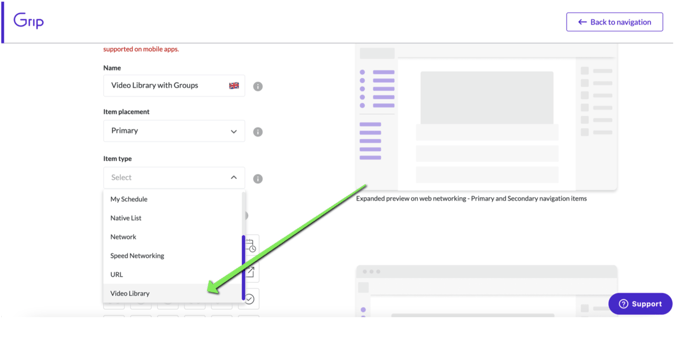
3. You will then be able to select the video groups you would like to show to your participants. You can also select the list format you would like to display the groups.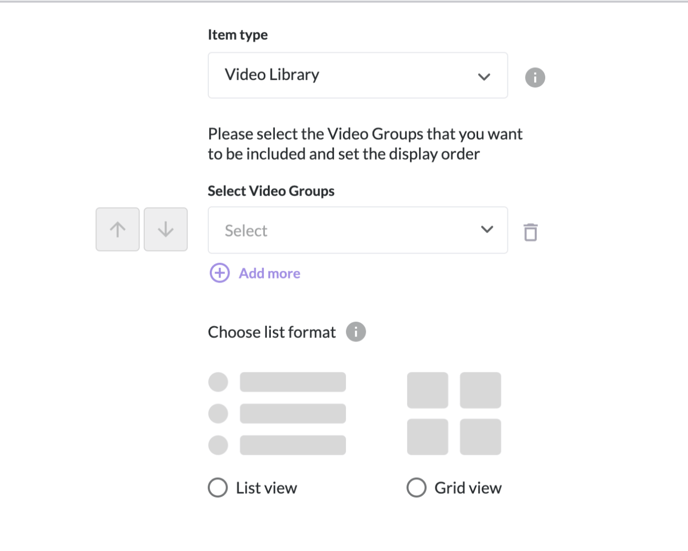
4. Select the drop-down and add your groups. You can add more groups by clicking on the ‘Add more’ button. You can also order the Group, by using the up and down arrows to move each group.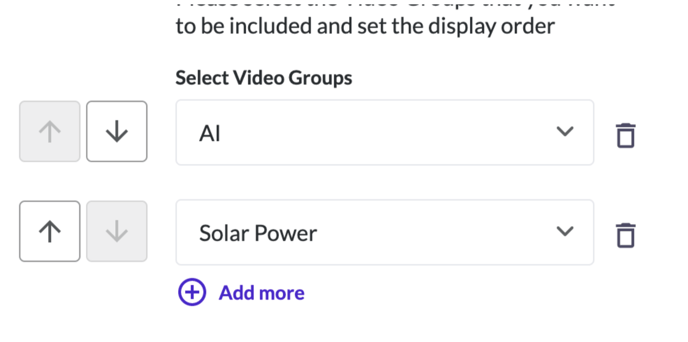
What will your event participants see on the web platform?
When your event participants select the navigation item that you have created, they will see Videos groups that you have configured and assigned. More videos will be visible in the group after the user has selected ‘Show All’. A number will show that indicates the number of videos that are part of the group.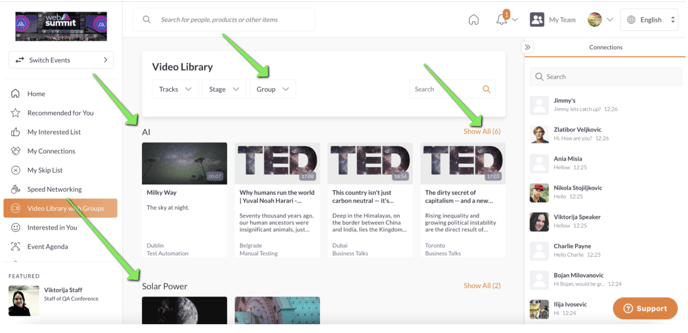
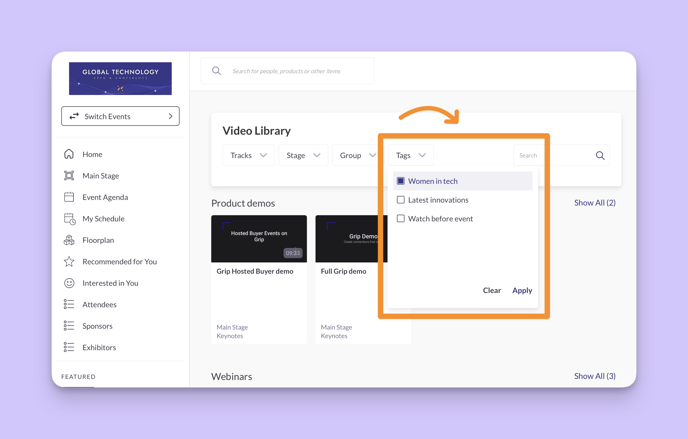
The event participants will also be able to use the filter and select which Group they want to see.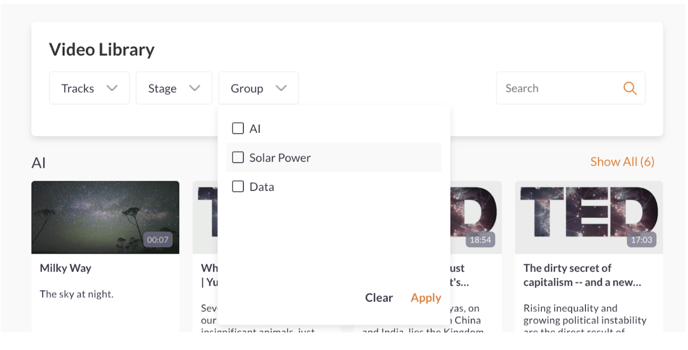
Video Tags
These are tags that can be added and assigned to videos in your video library. Key benefits of using this feature include:
- For event organisers:
- Better categorization: Event organisers can use tags to streamline video library management
- Increased engagement: If participants can find what they want with less friction, they’ll be more likely to stay in your event for longer
- For event participants:
Improved filtering: event participants can easily filter and find videos with those tags in the video library.
How to add video tags?
1. The first step is to create a 'Video Tag Collection'. As the name implies, here is where you will be able to create a collection of video tags, which will allow you to assign tags to your videos.
Within your video library, there is a tab called Tag collection. Once in this tab select “Create video tag collection”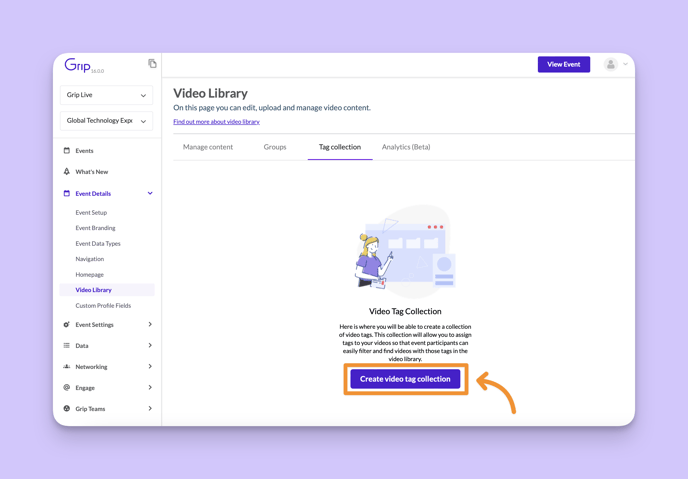
2. Name your Video Tag Collection on the field then click 'Create video tag collection'. In this case, we're using ' Tags' as an example.
Note that this label will be shown to users on the web platform on the filter. This label is also multi-language so you can create a label for your tag collection for each language you have configured for your event.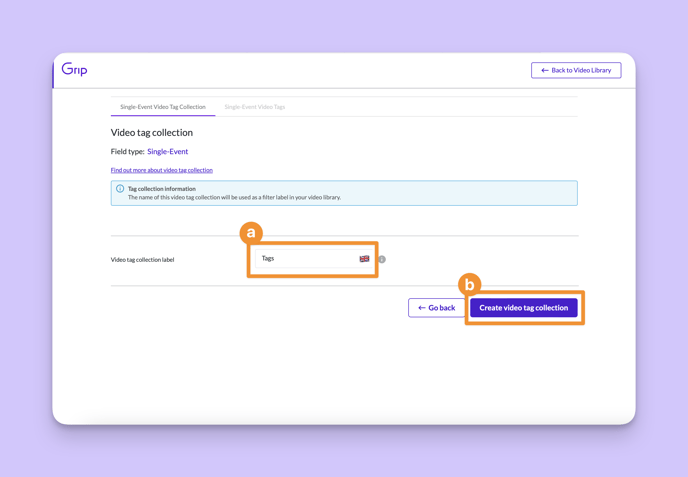
3. Select 'Add rows' at the top right of the table. This will add rows for you to now add your tags.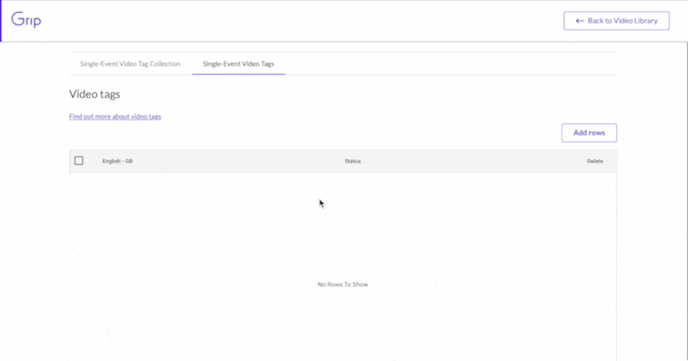
4. Add your tags and then click on 'Save new video tags'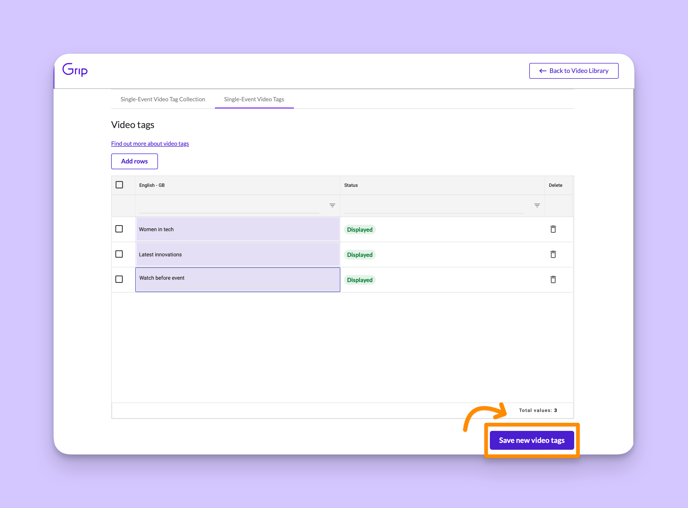
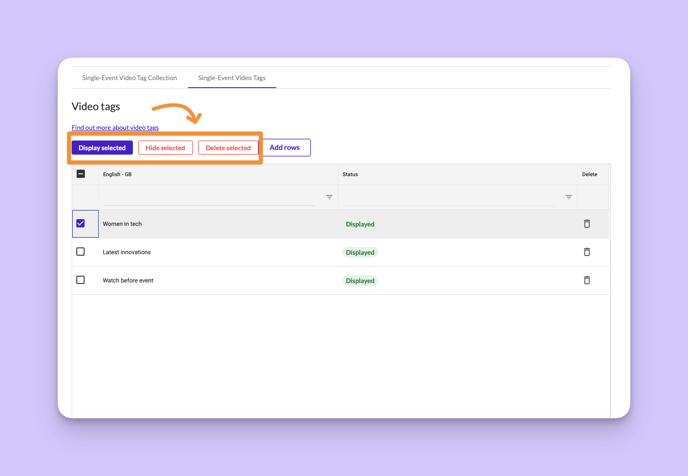
5. Manage tags by selecting the tag you wish to edit and choose one of the options provided: 'Display selected', 'Hide selected', or 'Delete selected'. Note that deleting tags that are already associated with a video will remove this association and will no longer be part of the video that it was associated with.
6. After completing these steps, you'll find your new tag collection:
a) Under 'Tag Collection' in the video library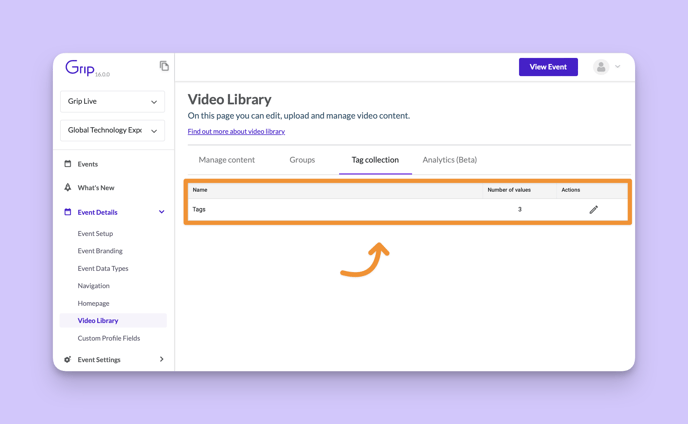
b) And on the 'Manage Content' section at the top of the page. You can use this to manage which videos have tags based on your selection.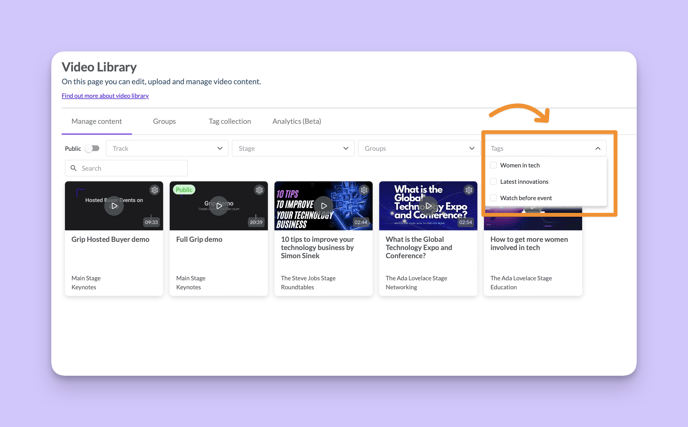
7. You are now ready to assign these tags to videos. Click on the settings icon on the top right of each video card. This will open the settings bar for the video selected. You will find your new tag collection. In this example, you can see it's called “Tags”.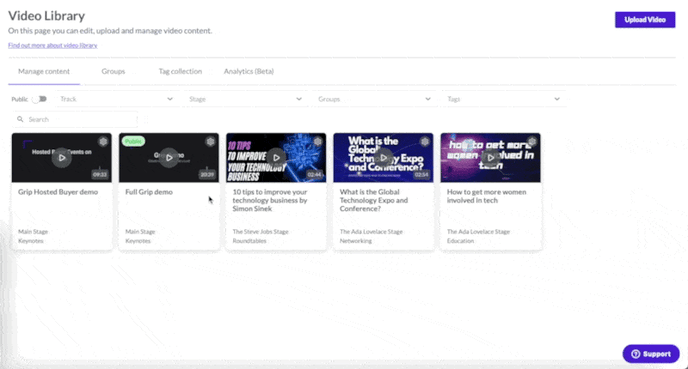
You can assign more than one tag to a video as seen in the example below.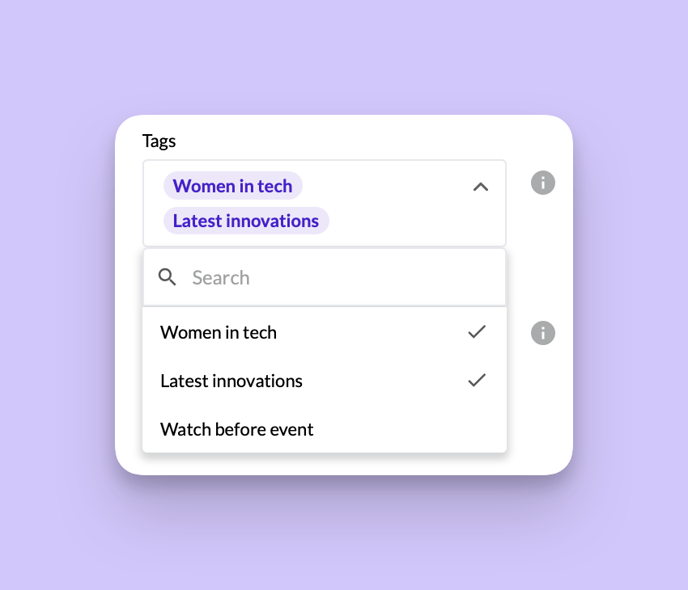
What does this look like for your web participants?
Event participants can easily filter and find videos with those tags in the video library.
Video Carousel Block on Home Feed
Introducing our new video home feed block - the perfect way to showcase your best videos on the homepage and drive engagement on the platform! With our easy-to-use video carousel banner, event organisers can highlight the videos they want to promote and bring them front and center for participants to see.
How to create a video carousel block?
1. To create the video carousel homefeed block, navigate to the Homepage page and select “Add a new block” on the top right of the page.
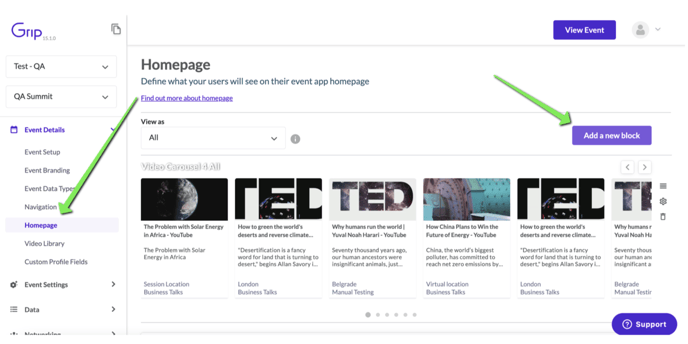
2. Next, select Video Block and click on the video carousel.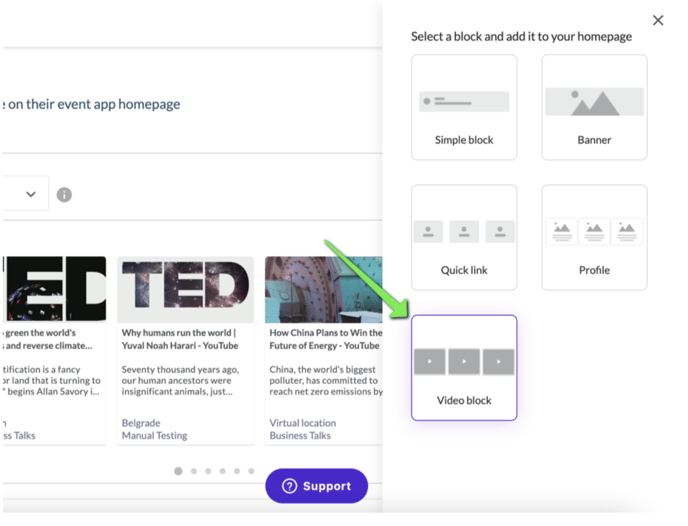

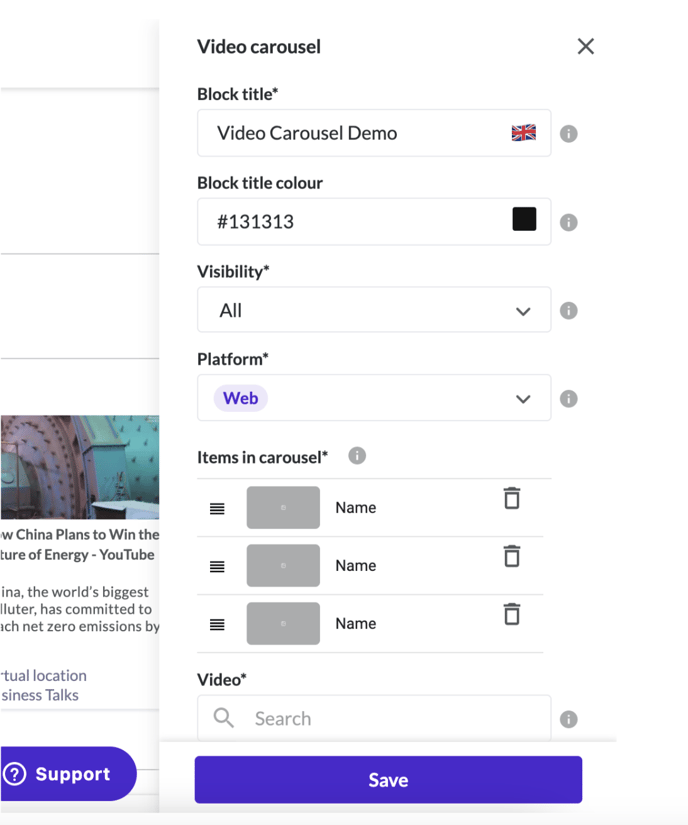
3. Configure the video carousel and choose which videos you want to be seen on the video carousel.
- Block title: the title that will be shown above the video carousel
- Block title colour: the colour you want the title of the block to be
- Visibility: Create different video carousels for the different user data types.
- Platform: Platform will always be Web. Mobile is not supported for this feature.
- Items: add the videos you want to show in the video carousel.
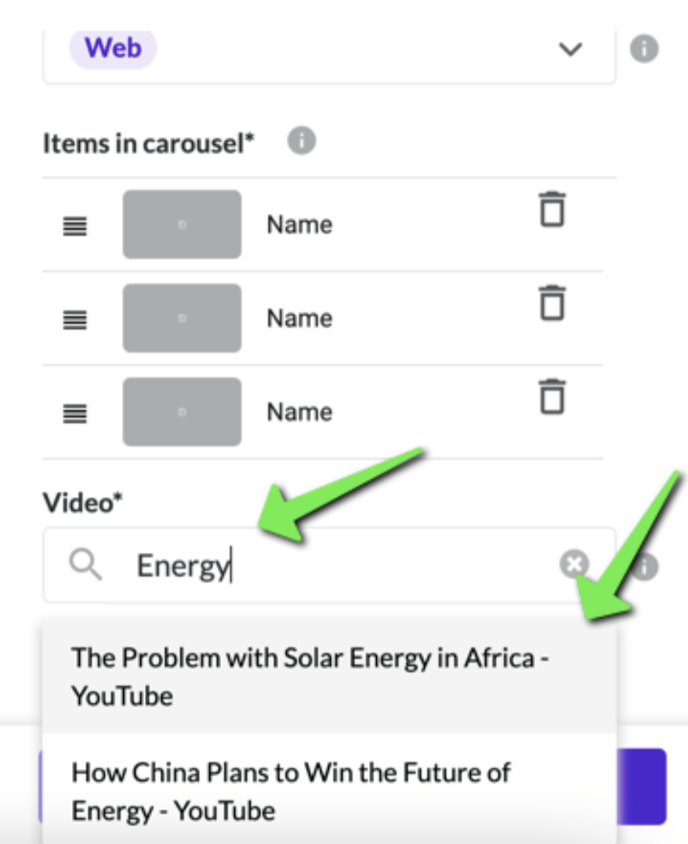
4. To add videos to your carousel, search for the videos from the video library using the title of the videos.
5. Once you have selected the video you want, you will see the thumbnail and title of the video in the items list above the search. To add a new video to the carousel, click on “Add item”. This will open the search for you to add a new video.
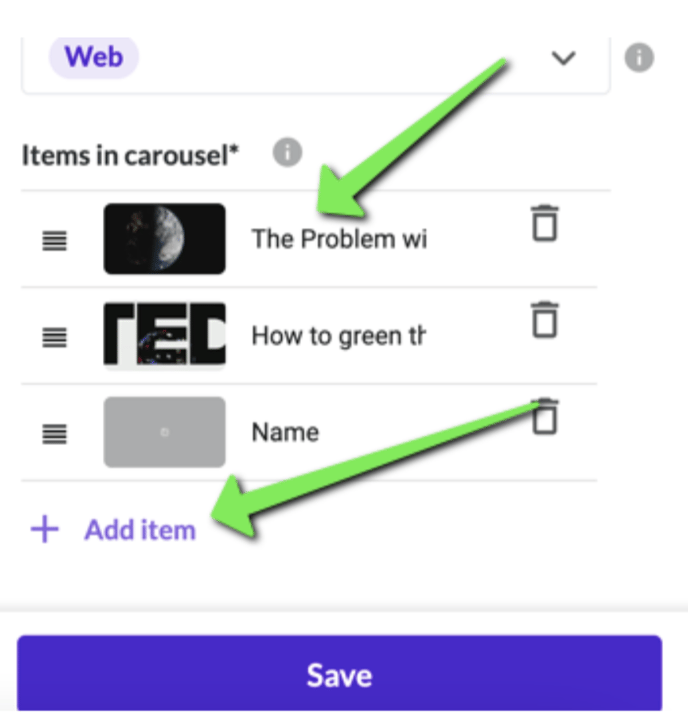
6. Now that you have added all the videos to your carousel, you can change the order in which these videos are shown in the carousel by using the 3 lines icon on the left of the thumbnail, and dragging and moving the video item up or down.
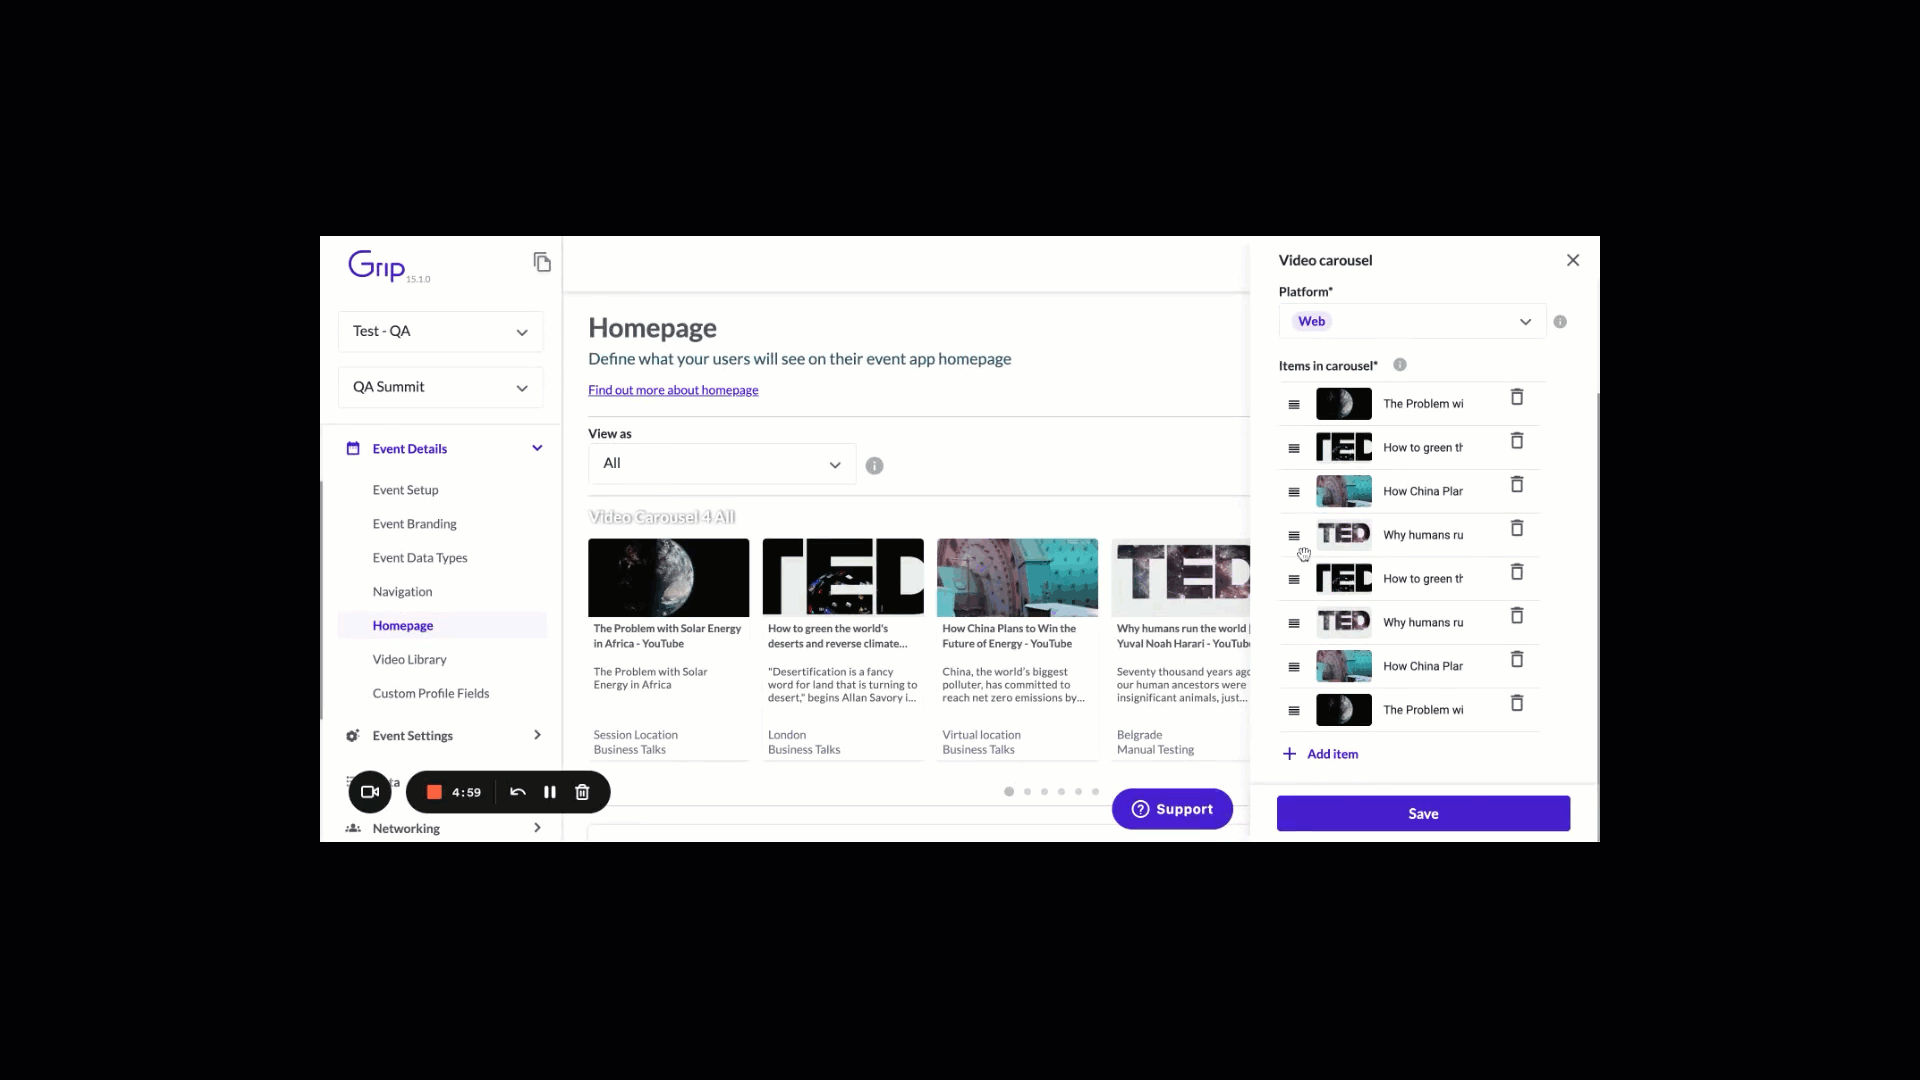
7. Once you save the video block, you can preview what it would look like on the web network on the dashboard and you can use the scrolling icon to scroll through the video carousel on the dashboard.
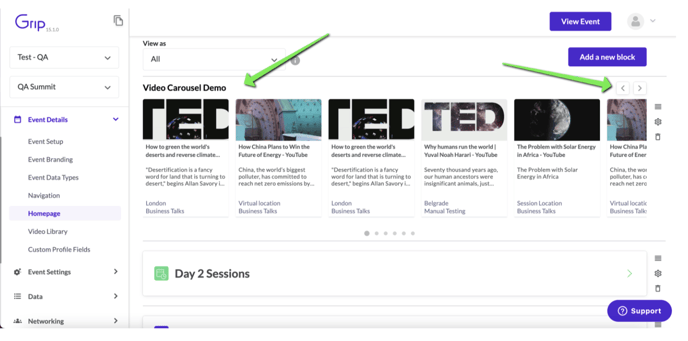
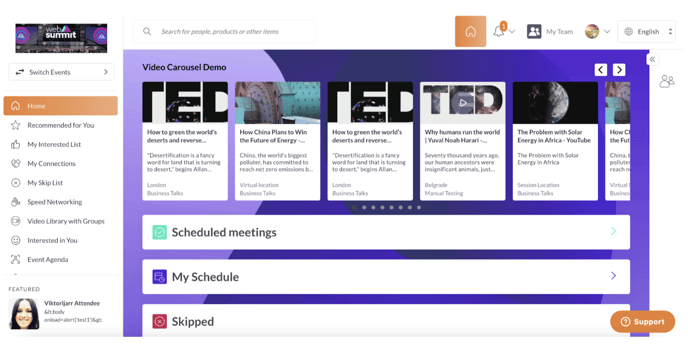
What does this look like for your web participants?
Event participants can see the video on the homepage. They will be able to scroll through the carousel using the right and left arrows on the top corner of the homefeed block.
When the user clicks on the video they will be taken to the video page where they will be able to watch the video.
FAQs
Is the 'Analytics' section available?
The Analytics section is currently in Beta so may not function how intended at this time. We are working on improving this feature.