How to Request a Meeting on the Event Platform
In this article, we’ll guide you through the simple steps to request a meeting on the event platform.
Ways to Find Event Participants:
- Global Search: Use the search bar to find participants by name.

- Browse Event Lists: Explore the participant lists on the platform and use filters to find people you’d like to meet.

- Recommended for You: The platform will suggest up to 10 participants based on your profile and interests.

How to request a meeting?
On a desktop (web)
-
Find the person you want to meet
Use the search bar, browse the attendee list, or check your recommended matches. -
Click on their profile
This opens their full profile with more details. -
Click the calendar icon labeled Request a Meeting
-
Pick a time and location
Choose from the available time slots in the calendar.
✅ Only time slots and locations that work for both of you will be shown. -
(Optional) Add a message
Share why you'd like to meet. A short message can make your request more personal and increase the chance they’ll accept. -
Click "Send Request"
That’s it! Your meeting will show as Pending until the other person accepts or declines.
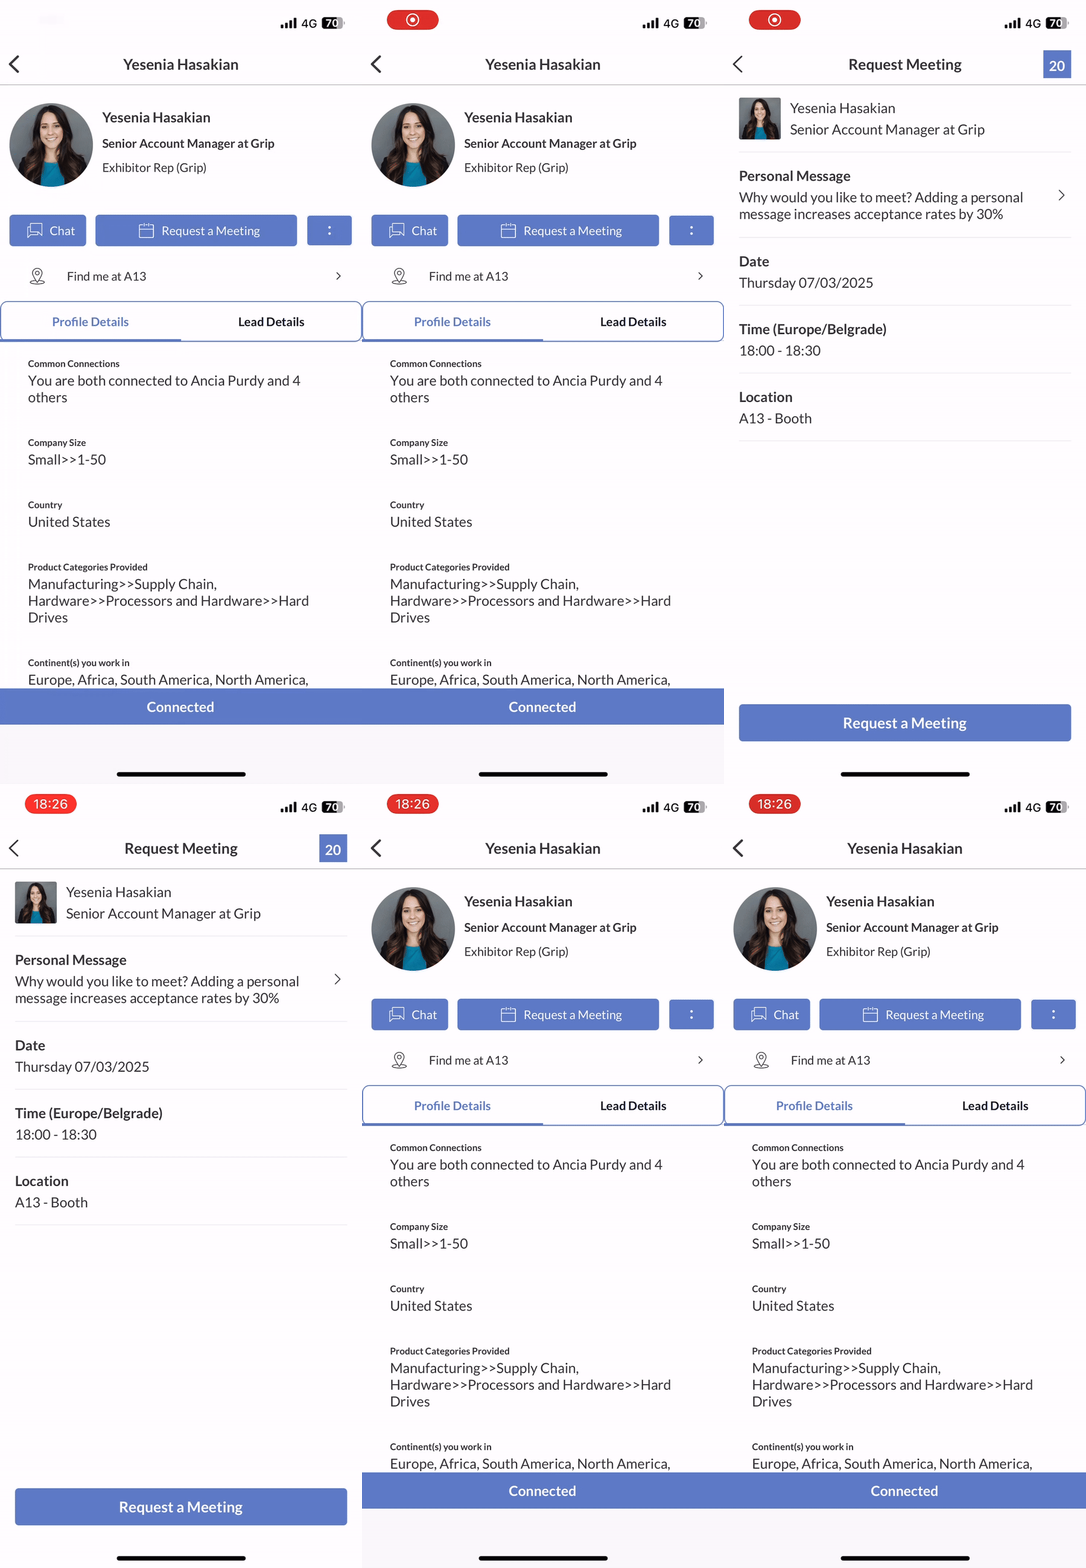
On the mobile app (iOS and Android)
-
Find the person you want to meet
Search, browse, or check recommendations. -
Tap on their profile
-
Tap the calendar icon labeled Request a Meeting
-
Pick a time and location
✅ Only time slots that work for both of you will be shown. -
(Optional) Add a short message to explain your reason for the meeting
-
Tap "Send Request"
Your meeting will appear as Pending until it's accepted or declined.

You can view scheduled meetings with a specific participant on their profile page. Additionally, an overview of all your meetings is available in the "My Schedule" section.
Timezones: The times displayed on the platform depend on the event format. For fully in-person events, all times will be shown in the local timezone of the event. For hybrid or virtual events, times will be shown in your own local timezone. This setting cannot be changed.
Meeting Statuses Explained
Understanding the different statuses of a meeting can help you manage your schedules more efficiently:
- SCHEDULED: The meeting has been confirmed by at least two participants (the organizer and one invitee).
- PENDING: Someone has requested a meeting with you, and you need to accept, decline, or reschedule it.
- AWAITING RESPONSE: You have requested a meeting, and the recipient has yet to respond.
- DECLINED: The meeting has been declined by one or more participants.
Note: You do not need to be connected with someone to request a meeting with them. A connection will automatically form once the meeting request is accepted.
Note: Some events are set up to prevent meeting requests from blocking your time. In this case you will be able to have several pending meetings for the same time-slot. These meetings will be marked as 'meeting clashes' - easy for you to recognize and reschedule, or request a change from the meeting organizer. You will not be able to accept those meetings unless the clash is resolved.
Accepted meetings always block your time.
Adding More Participants to the Meeting
If multi-user meetings are enabled, you can add more participants to your scheduled meeting. This can be done either in the My Schedule section or directly from the profile of the event participant by clicking "+ Add attendee" under the invitees..gif?width=600&height=310&name=ezgif.com-video-to-gif-converter%20(4).gif)
Note: On the mobile app, only 1:1 meetings can be scheduled. However, you can still accept or decline multi-user meeting requests within the mobile app.
For more detailed instructions on creating multi-user meetings, visit this support page.
FAQs
Q: How is the time displayed when requesting meetings?
A: For fully in-person events, times are displayed in the event's local timezone. For hybrid or virtual events, times are shown in your local timezone. This setting is automatically determined based on the event format set by event organiser.
Q: Can I change the timezone displayed on the event platform?
A: No, the timezone setting cannot be changed. In hybrid/virtual events, it will follow the timezone settings on your device.
Q: Is there a character limit for messages sent with meeting requests?
A:
- Sending a connection request: 250 characters.
- Sending a meeting request: No character limit.
- Declining a meeting request: 100 characters.